Thursday, November 30, 2017

Merry Christmas by Shelly


Hey y'all! Shelly, here.
Today I'm swinging in to share a fun Christmas card with you! 


I started with my base, which I chose kraft cardstock for. After I did a little cutting with some snowflakes and white cardstock. Easy peasy, right?!...Once done I simply arranged them on my card and then glued them down. 


Next, I added a strip of red cardstock with a 'Merry Christmas' sticker on it. Then added some foam squares on the back and added it to my card base. To top things off, I added a touch of jute twine. Simple and sweet, yeah?!...

Thanks so much for stopping by!
Enjoy your day!

SRM Stickers supplies:

Jute Twine
Wednesday, November 29, 2017

Welcome Baby Cards by Melanie


Hello, Melanie joining you today to share some baby cards. Lately we have had quite a few babies to welcome into our family and circle of friends. I love to have a handmade card to accompany the gift. Here are a couple of baby cards I made to celebrate the birth of new little ones.
 SRM has THE best stickers for making cards! There are all kinds of sizes, fonts, shapes . . . it is awesome :) I love how they can be easily cut apart to fit exactly what you need.

For this Precious Baby card I used the Sentiment/Baby sheet as well as the We've Got Your Border/Pastel for "Hello Beautiful".


The Fancy Sentiments/Baby "Welcome Little One!" is such a sweet way to say just that. I added a bit of buttercream twine at the top of the banner piece for an extra special touch.


To finish off the look for each card, I added a border to the envelopes from We've Got Your Border/Baby Boy


Hope you enjoy these cards and are inspired to make some of your own :)
SaveSave

Tuesday, November 28, 2017

Pretty Frame Decor by Tangii


Hello, Tangii here.  For today's project, I've taken a pretty frame that I picked up and decorated the photo part.  It would make a beautiful Christmas gift for someone special in your life!


This was super easy and lots of fun to put together!  Just a few scraps of paper, the frame and the Just Believe stamp set, the coloring medium of your choice and a couple of fun embellishments (totally optional!).


I found a piece of scrap paper that liked for the background, then stamped out several images from the Just Believe stamp set.  I colored my images in and then just fussy cut them all out.  The sentiment is stamped on a couple of dies I have.  I added a small button with twine in the middle of the larger flower for a little more texture, and all of the pieces are "popped up" with dimensional type sticky dots.


Here it is on it's new home!  It fits in beautifully!  This would be easy to swap out too, maybe make a few different panels and swap them out from time to time.  OH, by the way, the glass is behind patterned paper, so as not to smoosh the flowers, etc.  Well that's it for me, thanks for stopping by!!!

For this project I used Just Believe stamp set
Happy Crafting!

Monday, November 27, 2017

Ho Ho Ho Christmas Card by Shantaie


Ho Ho Ho Merry Christmas...well not quite yet, but it grows closer with each passing day, and getting a head start is always a good idea!  Hello from Shantaie!


I cut this Santa with my Silhouette and just loved the idea of him holding a sign, I added a clear sticker from we've got your sticker merry to some black cardstock and placed it in his mittens.


I wanted to add something special to the little sign, so I put a layer of glossy accents on top of the sticker and let it dry, the effect is super shiny and dimensional. A bit of sparkly fluff was also added to the beard, and trim, as well as a sprinkling of "snow" in the way of glitter stickles.


To finish the card another clear sticker from Sentiments Happy Holidays was added, and I double wrapped a bow of jute twine, a perfectly fuzzy textured element to top it all off! 

Friday, November 24, 2017

'Tis the Season to be Jolly! by Shelly


Hey y'all! Shelly, here.
Today I'm swinging on in to share a sweet little Christmas tag and gift with you! 


I started with my tag. I kept things nice and easy, so I just built my tag from the bottom up. I started with my patterned paper, then added a touch of kraft cardstock, along with a doily and dark brown cardstock. Once done, I added my sticker on top. Simple, right?!...


After finishing my tag, I simply used a clear container and added some deep green cardstock to the front and back of my container on the inside of it. Once having that done, fill the container with any treat you like. :) To finish things off, I added my tag to the container using two colors of jute twine. Easy peasy, yeah?!...

Thanks so much for by!
Enjoy your day!

SRM Stickers supplies:


Thursday, November 23, 2017

Happy Thanksgiving! Throwback Thursday!


Happy Thanksgiving to our USA readers! We hope your holiday is filled with family and joy. Sharing just a few projects for you today...  These are projects from the past but such fun and easy to create even last minute for your table.

Susan altered a treat container using Marvy's Border Punch System and SRM Stickers to give as a special gift;


And here's a wonderful idea for paper napkin rings by Deana Boston . Deana also used Marvy's Border Punch System.


Have a wonderful holiday, we'll see you again on tomorrow! 

Wednesday, November 22, 2017

Using Vinyl in Bible Journaling by Samantha


Hello! Samantha with you to share some Christmas Bible journaling. To create this page I decided to do something I've been wondering about for a long time: using vinyl in Bible journaling. 


 For this page I used black vinyl, silver vinyl, Reminisce white gel pen, Marvy gold paint pen, 3 different shades of blue ink, and a Silhouette Cameo (or a way to cut vinyl).


 I started this page by sponging on shades of blue ink for the background. Then, I cut out the city of Bethlehem from black vinyl. Since it's one large piece, I just peeled it off and stuck it on the bottom of the page like I would a sticker. 

Next, I cut the words "Oh little town of Bethlehem" out of silver metallic vinyl. Because these were much smaller pieces, I used transfer tape to move the whole phrase onto my page. I wasn't sure if the transfer tape would stick too much to the Bible page (since it's so thin), but it didn't. Go right ahead and use vinyl and transfer tape in your Bible, just move slowly!


I finished up my page by using the white gel pen to add lots of little stars and the Gold paint pen to add one big star.  


I'm really excited that I finally tried using vinyl in Bible journaling, and that it turned out so well. This adds endless new possibilities for creating! 

Thanksgiving Table Setting by Tangii


Hello, Tangii here.  Today I'm prettying up our Thanksgiving Table!  Hope this gives you some last minute ideas of how to fancy up your table for tomorrow! I've made a couple of Silverware Pockets using Burlap Bags.  These are easy to make so let's get started!


The Burlap Bags come in 2 sizes, I used the smaller.


This is one of those projects where you can just use scraps.  So I grabbed some Fall Leaves from some leftover Garland I had from making a Wreath.  For this one I grabbed a large Heart die and some simple patterned paper scrap.  The "Gratitude" and the small leaf on the heart are from the Express Yourself, Thanksgiving sticker set.  The banner across the heart is just another die, and the "Gratitude" sticker fit perfectly on it!  I just added a ribbon bow & button cluster and Voila!!


For this one I did pretty much the same thing, but to mix things up a bit I used a Tag die here.  The "Giving Thanks" is from the Express Yourself, Thanksgiving sticker set.  The leaf sticker is from the Say It With Stickers, Thanksgiving sticker set  Ok, that's it for me, thanks for popping in!

Happy Crafting!

Tuesday, November 21, 2017

Gift Wrapping by Giorgia


Hello SRM friends, Giorgia here today with you to share an idea for a special gift.  I love to create handmade packaging and with SRM bags and stickers it is really quick and easy.  I created a Christmas bag to contain a gift for one of my creative friends (we are a group of girls who meet each month to create projects all together, we have so much fun!)


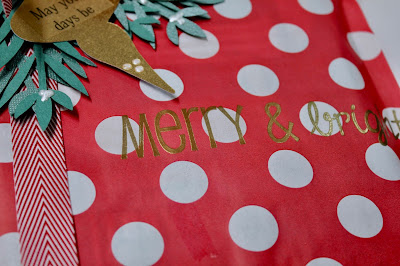
Here you can see my gift: it is an handmade faux dori (if you are interested in how I made it, you can find the photo tutorial here in my blog.) I gathered all the supplies I needed and started creating my bag. I chose the red polka dot bag because it screams Christmas to me, and the bigger size was just perfect to contain the faux dori. 


To close the bag I fold the top, punched two holes and passed red jute through them, then I created a bow. 


In a first time I thought to use the white heart paper doily but then I changed my mind: I composed the sentence "ho ho ho, merry Christmas to you!" with some stickers, alternating red and black color. I attached the stickers to white paper and then adhered them on the bag with different angles to create movement.I also added two circular stickers because they reminded me of the polka dots.


Until next time,
ciao, Giorgia 

SRM products used 
  | red jute | Red polka dot patterned bag big size | Express Yourself/Christmas We've Got Your Sticker/Merry Say It With Stickers/Birthday

Monday, November 20, 2017

East & West Bible Journaling by Samantha


Hello! Samantha here to day to share some Bible journaling. Today I've got a verse from Psalms, "As far as the East is from the West, so far has He removed our transgressions from us."


For my page I used 2 SRM stamp sets; Bible Backgrounds and Heaven and EarthColorIn Watercolor Pencils, a Reminisce White Gel Pen, a LePlume Black markerSticker Stitches in white, and some stamping inks. 


I used my colored inks to sponge on a soft background of blue, purple, and orange. I then stamped the crossed arrows stamp from Bible Backgrounds with the same colored inks.


I used a mixture of stamps from the Heaven & Earth stamp set and the black LePlume marker to write the verse in the margin of my page. I used the white gel pen and watercolor pencils to color in the arrows, mountains, and words. I finished up by adding a few white stitches stickers randomly to the edges of my page.


What have you been Bible journaling lately?  

Friday, November 17, 2017

Christmas Joy Card by Jenn


Hi Friends, Jenn here to spread a little Christmas cheer! Today I thought it might be fun to get you thinking about Christmas. It is cold where I live and already I am thinking about package toppers and greeting cards.  If you start right now you can rid yourself of all the Holiday stress that no one needs in their life!

The card base for this card is 4 1/4 by 5 inches. I cut a piece of dark green cardstock for added color and pop. Then I cut piece of white cardstock just a smudge smaller than the card base...I just kinda eyeballed it. I am still really new when it comes to proper procedure.

 For this card I started by pulling out my old thrift store find hymnal. I pulled out a Christmas hymn (Hark the Harold) to cut some simple bunting shapes. I love the vintage look this simple little bunting adds to the card! If you don't have a hymnal I found multiple free clip art hymnal pages over on Pinterest. I wanted to create a little contrast between the bunting and cardstock and between the white cardstock and the dark green card base so I lightly inked the edges with a black pigment ink. 


In the bottom left corner I stamped the word 'Joy' from the big sentiments merry stamp set in Versafine clear ink then dusted it with gold embossing powder. 


Gold felt like the perfect Christmasy addition to the card. I really wanted to add a little stitching just because...so I created a few messy stitches in white. 


Next I pulled out my twines and picked a basic black and red, and added a simple tiny red bow. Adding a few stars really helped pull your eye around the page.


Thanks for stopping by! I hope I gave you a fun new inspirational way to use those gorgeous big stamps and rustic twine.

SRM Suplies Used:

Thursday, November 16, 2017

Gift Wrapping by Shantaie

Hello!  Shantaie here today to share some gift wrapping ideas!


I'm one of those people who cherish the opportunity to wrap gifts, I make an event of it, and truly find it to be a joyful activity. That being said I know not everyone feels the same way I do, so I thought I would share a couple of ways to add beauty to simple packages that are so pretty that you may just convert.


Let's start with a simple square kraft box Before opening the box add a joy stamp from Big Merry in a row of three with versamark ink and gold embossing powder, heat set and open box. To add a fun ribbon detail I cut a small slit in the box front bottom, and wind around to tie on top


Kraft boxes come in a ton of different sizes and I reccomend have them on hand for every occasion, but I especially stock up before the holidays.


We all love the ease of a gift bag, and if you've never given any thought to flat bags as an easy but beautiful option for gifts allow me to share with you my love of these bags!! They come in many sizes, colors and patterns


Like the box above I used a stamp to add a sentiment and embossed it with gold powder, the gift was added and I folded the top of the bag over, and tied a bow, to that I added a spray of die cut branches and a lovely gold ornament tag with a sticker from Fancy Sentiments Christmas and a spattering of pearl dot accents.


Gift wrapping can be easy if you start with a few simple basic containers, and a little crafty fun! 

Wednesday, November 15, 2017

Teacher Shaker Card by Michele


Good morning friends!
Michele here with a card that is near and dear to my heart!
I am a 4th grade teacher and I love to recognize other teachers for the hard work and dedication they give every single day. 
My children were blessed to have some pretty remarkable educators in their lives!


I created a shaker card using oval dies and the little apple stamp from the Healthy Plans Clear Planner Stamp.   The apple was stamped repeatedly around the frame, colored in with Copics and given a coat of glossy accents.  Once it was dry, I used the White Reminisce Gel pen to add a highlight to each apple.  


I filled the center with coordinating colors!  I used the teacher sticker from the Quick Cards Back to School Stickers. 


Thank you so much for popping in today!
Have a great day!!