Tuesday, May 31, 2016

Mermaid Heat Transfer Bag by Shantaie


Hi! How are you today? Feeling a little summery yet? Me too!
I've been having fun playing with some black heat transfer vinyl and 
linen bagsto make these splashy mermaid treat bags.


I love this mermaid cut found on the Silhouette store, and decided to alter it, by only using the tail portion of the design, "splashing into the water" was what I was going for! I cut the design into heat transfer vinyl and ironed it onto the bag with a dry hot iron. I wanted a bit of color so I pulled out a green and a blue glimmer mist, and sprayed fairly generously! :) 


I also added a few little heat transfer gems, and glued on some half back pearls. In the top corner A small glass bottle filled with sandy hued glitter, and a rope bow are just the cherry on top!  Dive right in and fill the bag with candy, a strand of pearls or some fabulous beach waves hair products to give as a summer gift! 

I'm Shantaie and I appreciate, you stopping in to take a look at todays fun heat transfer vinyl project.   If you love vinyl, drop by our vinyl Facebook group and see what other people are doing with their vinyl and be sure to share your vinyl projects with us!


Monday, May 30, 2016

Bible Journaling with Christine


It is so relaxing to do Bible Journaling during stressful times!  I love searching for a verse to create with that hits home!  My family is currently packing up for an out of state move and there's a whole lot of trusting in the Lord happening.  So Jeremiah 17:7 felt like the perfect verse to capture my mood and serve as a reminder as I open up my Bible!


I like to journal on some sturdy cardstock and insert it by the verse in the Bible - I know lots love to do the margins - I just have a different approach :)


After creating my background using watercolor paints, I used a combination of stickers and stamps to write out the verse.  The Big Faith stamp supplied both the word "Blessed" and my stitching border.


I used the Words of Faith Stamp set for my crosses.  The solid black hearts come from the Life is Good stamp set and the others are punched out of patterned paper.  I have to mention how great the Black Le Pen is for this type of project - I used it for all my outlining and it works beautifully!


We've got a ton of new Bible Journaling stamps coming your way soon so be sure to stay tuned to see their release!

Friday, May 27, 2016

Soccer Treat Tubes by Juliana


Hi everyone! It's Juliana here with you today to share a great way to treat your little soccer star using SRM Stickers Tubes. These fabulously fun tubes come in so many sizes. All you have to do is select the one that works for the treats you want to fill it with. 


I used the Original Tube which is 7 x 1 inches. To decorate it, I grabbed a variety of SRM Stickers including the Say It With Stickers Mini SoccerTiny Stickers Soccer Balls, and Labels By The Dozen Black/White.

I adhered the Tiny Soccer Balls directly to the tube. Next, I selected several sayings and adhered them to white cardstock to create tags. I added a soccer ball to a Small Scallop Circle in White.


I then punched holes in the top of each of these and tied them to the top of the tube using a piece of ribbon.  The banner shaped label was perfect for adding a name which I attached to the back side of the scallop circle.


Now my treat holder is ready to be filled with my little soccer star's favorite treats!


How do you like to use SRM Stickers Tubes? Remember you can share them with us on our Facebook pageFlickr Group or tag us on social media with #srmstickers.
HUGS!
Juliana

Thursday, May 26, 2016

Graduation Party by Shantaie


Hi, and welcome back to SRM, I'm Shantaie signing in with a gold and glamorous graduation party!


My niece is graduating in a few weeks, she wants her event to be memorable, and unique!  The best part of being a paper crafter is being able to customize premade items, like these cards I picked up at the dollar spot in Target. A few little details and a sheet of SRM thank you stickers I can make a dozen thank you cards for her to send after the party! 


Need fast easy cards? just add the Thank you sentiment, and they are ready to go!


No party is a party without a cake or cupcakes! These cupcake toppers are quick because I picked up the pleated circles as part of a banner package, there were 8 for 3.00 and all I did was add a gold banner, and the SRM round sticker by the dozen take 2 graduation stickers and a stick to insert into the cupcake. These literally took 15 minutes total! 


Super sweet right?


Invitations are the "headliner" to any party, and as we are doing a casual glamorous party, these simple but elegant cards are perfection! I love the fun 2016 sticker under the gold embossed graduation cap, a quick peel and stick and they are ready to go!


What could be more easy? You are going to love these SRM invitation inserts, all the info you need is ready to fill in. Quick and simple!


I used the chevron embossed glassine treat bags and filled them with chocolates of gold and lavender that match the party. They are folded closed, and topped with a doily and layers of ribbon and paper flags, and sealed with a clothespin. A luxurious gold tassel is adorned with a 2016 sticker tag, and the flag to the left is sporting a sticker sentiment from the graduation stickers by the dozen take 2.  


All the elements to get a party started, right here. SRM has stickers, treat containers, and all the happy additions you need to make a party both easy and gorgeous!


Wednesday, May 25, 2016

Happy Spring by Michele


Good morning!  Michele here with a spring card to share with you today that was a bit of an experiment. I bought some new Tim Holtz crayons and went to town creating all kinds of interesting backgrounds.  I loved this black circular background and decided it would be perfect for a spring card! LOL! (Because who doesn't think black circles wouldn't be perfect for a spring card?) ;)


I added some glitter felt flowers, lace, ribbon, and a doily to brighten it up a bit.  I used SRM's spring sentiment sticker I glued on a scattering of sequins for a finishing touch. 


Thank you for stopping by today!

Tuesday, May 24, 2016

Kids Craft by Christine


Summer is coming up fast and it's always nice to have a few crafts stashed away to do with the kids!  Christine joining you today with a way to make a butterfly using our Original Tube and White Heart Lace Doilies.


All you have to do to create this is connect the bottoms of the heart doilies and then adhere those to the back of the tube!  Fill it up with candy of your choice! Easy Peasy!


Of course adding some googly eyes and a little smile up the fun factor!  Wouldn't this be a quick and easy treat for your kids or to do as party favors at a birthday party!?!


Monday, May 23, 2016

Design Team Call - 2016/2017


SRM Stickers, a leading paper crafting manufacturer with a focus on stamps, stickers, vinyl, doilies, containers, twine and calendars, is hosting a Design Team Call! Some of our current group of amazing Designers will stay on with us but we are looking for 6 new fresh faces and talent to add to our team to embark on a 12-month term to begin on August 15, 2016.  If you love working with stamps, stickers, doilies, containers, vinyl and twine, or if you love working in planners, creating with your Silhouette or if you love bible journaling, keep reading because we may love working with you! We're looking for crafters of all types: card makers, layout specialists, vinyl experts, planner people, bible journalists, altered artists, DIYers, Makers, party planners, gift wrappers and specialists in all things home decor to join our Design Team as we head into the second half of 2016 on a mission to dazzle, inspire and create. You're a perfect fit if you love stickers, doilies, vinyl, containers, packaging, parties, blogging, and inspiring others through your work. Now for the details

Design Team Requirements

You will be required to submit 2-3 assigned projects per month using SRM Stickers.

You will be asked to remain active at the SRM Stickers Blog as well as the Private Design Team Member blog.

You will be asked to participate in special events such as blog hops, challenges, and co-merchandising features.

Your term will be for the period of one year; August 1, 2016 through August 1, 2017.

The Perks

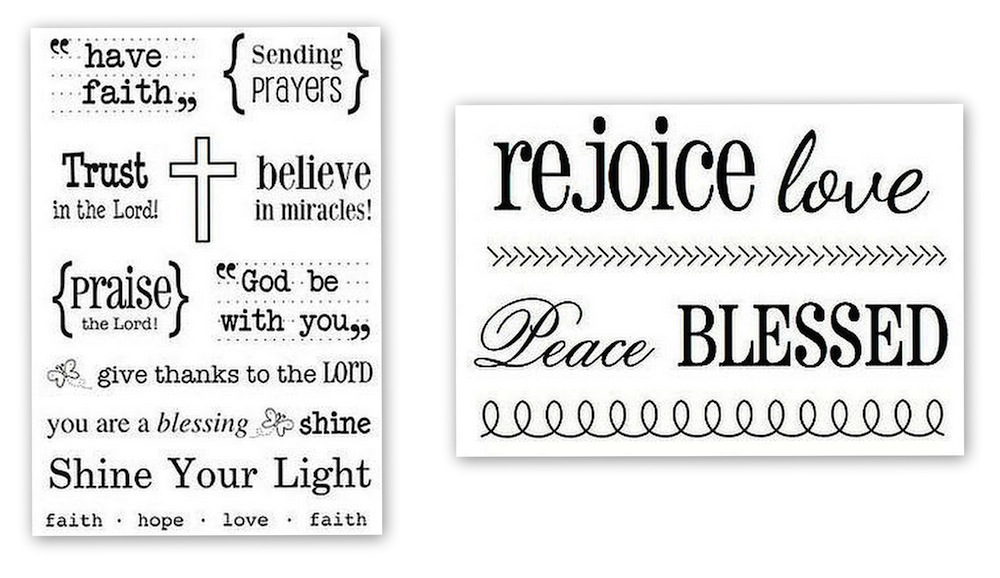
You will be provided with ample product to create your samples including new releases and a wide variety of complimentary product like Stamps, Stickers, Vinyl, Doilies, Tubes, Pillow Boxes, Glassine Bags, Twine, calendars and more!  

You will be provided with a SRM Stickers Design Team Badge to proudly display on your blog.

You will be designing for a manufacturer and your photograph/bio will appear at the SRM Stickers Manufacturing Blog.

Your work will be promoted to our retailers across the world.

You may be offered additional design team work for special shows, promotions, or publication materials.

As part of our strong relationships with other manufacturers in the industry, from time to time you will receive product to complement SRM Stickers, and to use for your samples.

Apply Now!

If this sounds like just the opportunity you've been seeking, please email us at susan@srmpress.com ("DT Application/Your Name" in the subject line) with the following;

-- your name
-- your email address
-- your blog address
-- your current design teams
- your past design teams
-- why SRM?

Deadline

Please direct your applications to susan@srmpress.com no later than June 20th at Midnight, PST. New Design Team members will be chosen and notified by June 25th then revealed at srm-stickers.blogspot.com on June 27th, 2016. Our new Design Team 
Members will become part of a company intent on making a continued splash in the online paper crafting community and as such, we are asking that only those with active blogs please apply.  No prior Design Team experience is required.  Prior SRM Design Team members may apply. 

Good luck! We can't wait to hear from you!

Watercolor Greetings by Shantaie


Hello! Have you ever wondered just how much fun it is to watercolor? Not only is it fun, the results are so pretty, and the best part?.....imperfection is applauded! win win my friends!  Nothing can be better than the feeling of being good at something on your very first try! A few simple swipes with gelatos on watercolor paper and a wet brush reveal a soft color transition just begging to be a card base!


I did my messy swiping in no a horizontal direction from top to bottom, after the water dried, I splashed a few spritzes of glimmer mist and added a gold butterfly die cut. For a greeting a SRM fancy sentiments stickers and a tiny section from little borders. The card is wrapped with a shimmer twine bow, because you can never have too much shimmer..... It's my alltime favorite twine!!!


The objective here was to make really fast and simple cards, that don't look fast! I think I can call this  "mission accomplished" :)


I do know this to be true, real cards from real people make a big differance in a persons day, they don't have to be pricey, or take hours to make, to make a big impact on someones day! :)

Friday, May 20, 2016

Flickr Friday


Welcome to another Flickr Friday where we feature cards or projects that we find on our Flickr. Today we have a wonderful card from a long time SRM user, Nathalie Leonelli.  Her work is perfection!  You can find more on her blog called An Ounce of Creativity


I love all that's going on in this beautiful card.  Nathalie tops it off with a SRM Happy Birthday clear sticker sentiment and some delicious twine!  YUM! 

Made anything lately with SRM Sticker products?  Be sure to share them on our Flickr and you just might find yourself featured on our blog.

Thursday, May 19, 2016

Personalized Notebooks with SRM Vinyl by Juliana


Hello SRM Stickers Fans! It's Juliana with you here today to share how to alter simple notebooks with SRM Stickers fabulous adhesive vinyl.


 I started with two simple notebooks from a local crafts store, Yes, they were cute in their original state, but they really called to me for a little color. That's were SRM's new patterned vinyl came into play! I began by selecting two colors for each notebook and with my niece's favorite colors in mind.


Next, I cut the patterned vinyl to just slightly larger than the size of the notebook. I peeled of the backing paper and slowly adhered the vinyl to the book. I recommend peeling off the backing paper as you go so that you avoid getting bubbles in the vinyl. However, if you do get a bubble, use a straight pin to poke the bubble and remove the air. Gently rub your finger over it and the hole that you poked with disappear. How's that for a fun little tip?!


I used the solid vinyl and cut strip  of it to cover the binding.  To add the initial, I cut the letter using my Silhouette Cameo and adhered it to the front cover using Transfer Tape.


The final decorative touch was a little tassel bookmark I created using twine in the following colors: Solid Twine in Marigold and Blossom and Baker's Twine in Lilac and Ocean. And of course they match perfectly with some pens from the Le Pen's Bright Set. I just love how the SRM Stickers vinyl added new life and loads of color to these simple little notebooks. Now I know my niece's are going to love them!


Wednesday, May 18, 2016

Bible Journal Art by Shannon


Good morning, Shannon here, sharing yet another bible journaling page with you! I'm offering you a little bit of ingenuity this morning.

Have you ever thought to add chalkboard markers to your journal entries?

The journal entry you'll see below was used using the BISTRO Chalkboard MARKERS above.  This entry also has LePen or two, of course!

The following pages are journaling the readings for April 30, 2016. I highlighted the text that I wanted to focus on, I also drew some arrows, well, seven...because when I journal, I try to focus in on the 7 gifts of the Holy Spirit. Fun Fact about me: Seven is a special number in my life as well, Paddy and Mack were both born on the 7th, and we adopted 2 of our 3 dogs on the 7th..and the other was actually born on July 7th...so you will always find seven somewhere in the things I share with you.


Here is a close up of the entry. You'll notice that the "chalkboard" is not a perfect, straight line, I don't do perfect, I can't draw a straight line with a ruler. It's just "not a thing" in my life, and I don't even attempt to try.

I added a lot of "dots" of various sizes and colors. I outlined my text too, I felt like alone it didn't stay out enough, so I went back after looking at it awhile, and committed to the outline. The beauty in using something like a chalkboard marker, you can go over it in black and begin again. It's "smeared" a little, because I wanted texture.


Here's an additional close up, you can see the outlines. The only thing I used that wasn't SRM, was a gold marker to add a bit of sparkle to the page as well.


Thanks for letting me share with you! ❤ 

Tuesday, May 17, 2016

Celebrate! by Michele


Good morning! Michele here with a fun water colored card using one of my favorite stamps from Jane's Doodles, Tea Time.   I stamped it in a light brown ink, and colored it with Kuretake Watercolor markers.  


I brushed gold Stickles on to the sides of the cups. I added brown liquid applique for the coffee and white liquid applique for the steam.  I had some leftover fabric from my daughter's room and decided to cut it into a strip for my ribbon.  As a final touch I added a celebrate sticker from SRM's  We've Got Your Border/birthday set. 


Thank you so much for stopping by today!

Monday, May 16, 2016

Graduation Card by Christine


Graduations are right around the corner and SRM Stickers has stickers that are perfect for customizing your cards to fit the colors of your school!  Christine joining you today with a quick graduation card using Graduation Stickers by the Dozen and the Year of Memories/2016 stickers. With these two sets you can easily make a whole bunch of graduation cards to take along to each party!


The stickers are clear and black so they work perfectly for personalizing with things like or sequins, cardstock, or even some Sticker Stitches!


I added the biggest 2016 I could in the center and at an angle to up the whimsy!


The Stickers by the Dozen make it easy to add lots of caps to the card.  I used a circle punch to punch it out so I didn't have to try to place my sticker to precisely.

We're looking forward to seeing what cards and treats you are making for the grads in your life!


Friday, May 13, 2016

Birthday Wishes - Day #4


I'm always looking a great ideas for birthday cards.  You just can't have too many birthday cards on hand.  When my team surprised me with all the beautiful cards that I've been featuring this week on the blog, many of them sent the card on to me.  What a wonderful surprise it was! 

First up we share with you a dreamy card from Shantaie Fowler.  She has used so many different materials on this layered card.  I simply love it!  From SRM she used the Happy Birthday Fancy Sentiment, some Sticker Stitches, twine, some white lace and some floral ribbon too!  


And here's a beautiful card from Stacey Schaefer who used a Jane's Doodles Wise Owl stamp along with a clear Happy Birthday sticker, a silver doily, punched pieces and some twine.  Gorgeous! 


Thanks for joining us in our Birthday Wishes celebration this week.  Which one is your favorite card?  Hard to choose.