Wednesday, December 31, 2014

Heat Transfer Pillow Tutorial by Annette


Happy Day SRM Stickers friends. Annette Allen here with you today to share a little love with a fun Heat Transfer Vinyl Pillow. For that special someone.
It just makes a room that much more special.

SRM Stickers Blog - Heat Transfer Pillow by Annette - #heattransfervinyl #vinyl #homedecor #diy

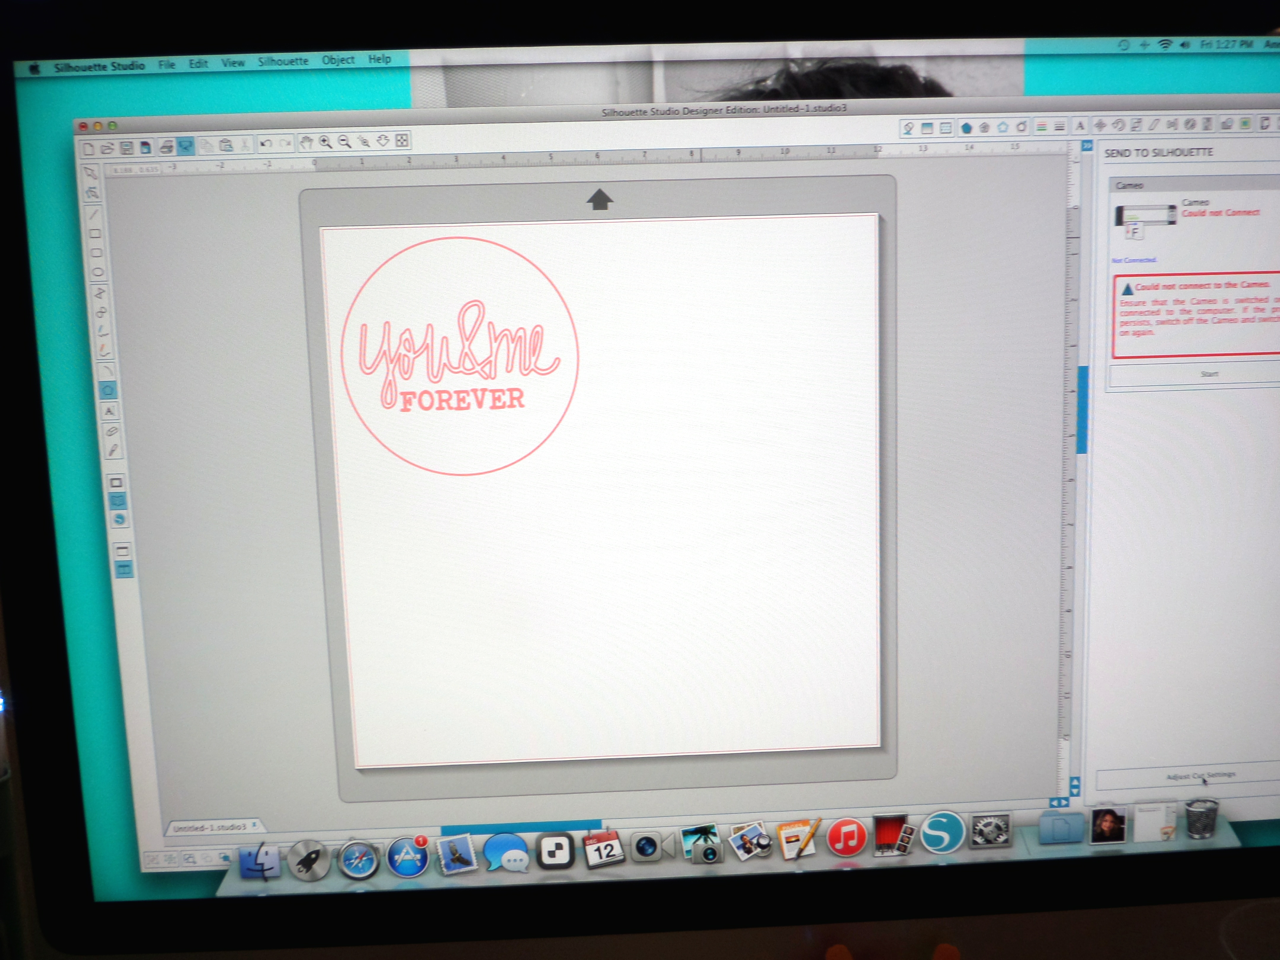
First I started with choosing a fun sentiment from the Silhouette Library.
SRM Stickers Blog - Heat Transfer Pillow by Annette - #heattransfervinyl #vinyl #homedecor #diy

After running through the Silhouette you just separate the extra Heat Transfer Vinyl from the sticky service. Make sure and take off all the Heat Transfer Vinyl that you will not be ironing onto your fabric.

SRM Stickers Blog - Heat Transfer Pillow by Annette - #heattransfervinyl #vinyl #homedecor #diy

Next I used a pen and round object to trace the circle onto my fabric. 
Then cut out.

SRM Stickers Blog - Heat Transfer Pillow by Annette - #heattransfervinyl #vinyl #homedecor #diy

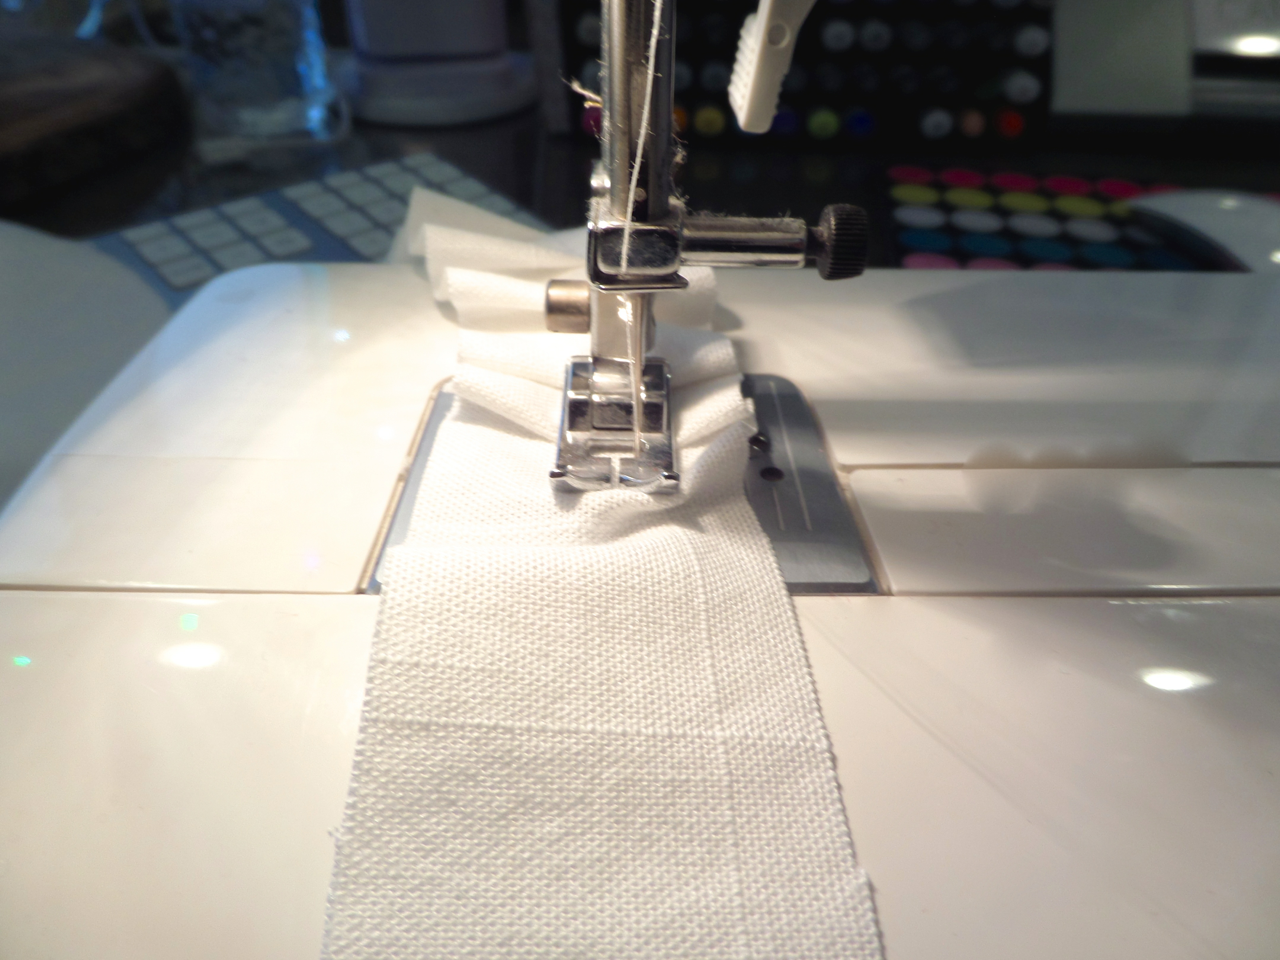
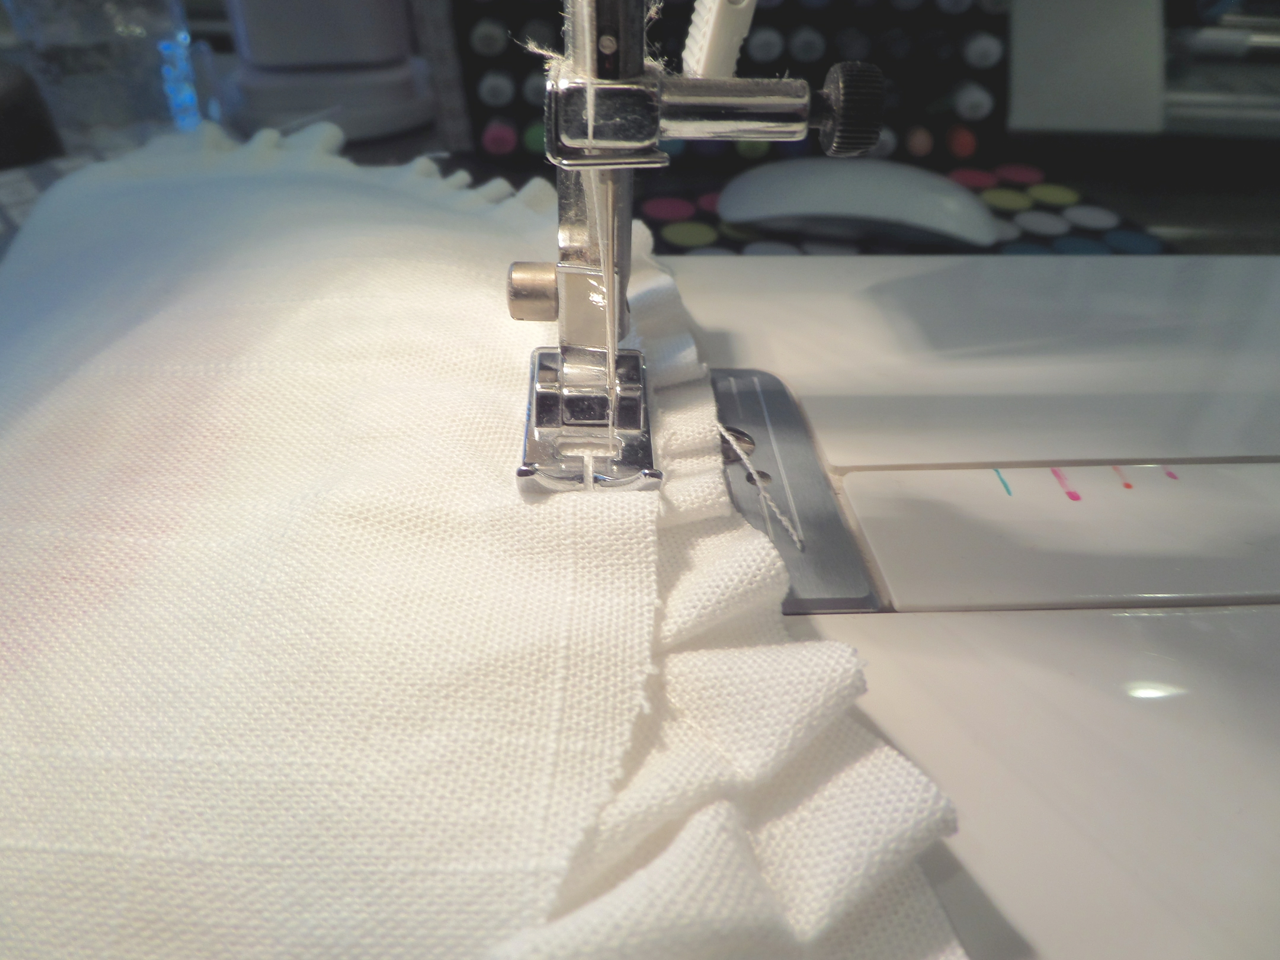
I wanted to have a fun border on the pillow so I cut strips and sewed overlapping the fabric.

SRM Stickers Blog - Heat Transfer Pillow by Annette - #heattransfervinyl #vinyl #homedecor #diy

Iron on the Heat Transfer Vinyl for about 3 minutes to my fabric or until the Heat Transfer Vinyl is completely solid on the fabric. Put your iron on the highest temp, turning off the steam. Do not put your iron directly onto the Heat Transfer Vinyl this will melt the Vinyl. Use a fabric cloth on the top of the Heat Transfer Vinyl when ironing. 

SRM Stickers Blog - Heat Transfer Pillow by Annette - #heattransfervinyl #vinyl #homedecor #diy

I am now ready to sew together.

SRM Stickers Blog - Heat Transfer Pillow by Annette - #heattransfervinyl #vinyl #homedecor #diy

And the result a cute and Loving Pillow.
Perfect for a Valentines Gift.
Something personal and from the heart.

SRM Stickers Blog - Heat Transfer Pillow by Annette - #heattransfervinyl #vinyl #homedecor #diy

Thanks for letting me share.
Happy Crafting.
Tuesday, December 30, 2014

Thanks Card by Cassonda


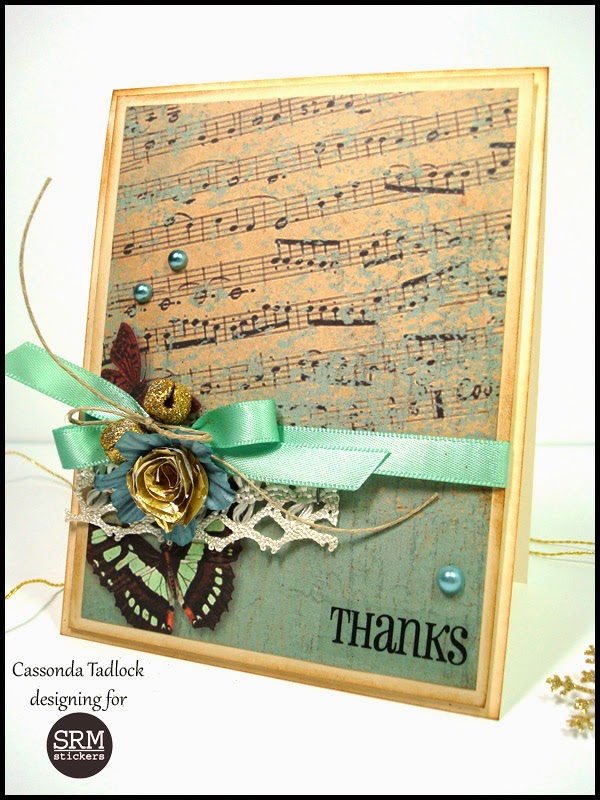
Hi crafty friends! Cassonda here to share with you a quick thank you card I made for a good friend of ours. I didn't even put the paper through the sewing machine that's how quick it was to create. LOL 

I started with some printed paper that was already stamped and embossed (gotta love short cuts, right?!) and adhered it to some cardstock. Then I just wrapped a small piece of ribbon around it and added a cluster of embellies in the corner by the butterflies. 

SRM Stickers Blog - Thanks Card by Cassonda - #card #thanks #thankyou #stickers #doilies

That sweet little flower was made using a 4" gold lace doily
{I think I have found my new favorite use for these. ;) }

SRM Stickers Blog - Thanks Card by Cassonda - #card #thanks #thankyou #stickers #doilies

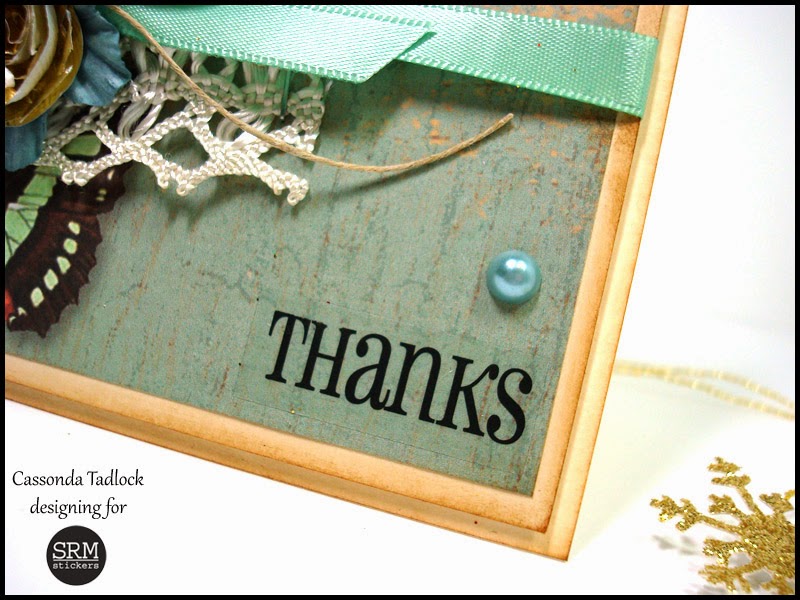
Final step...add a Thanks sentiment sticker and some pearls and the card is done. 

SRM Stickers Blog - Thanks Card by Cassonda - #card #thanks #thankyou #stickers #doilies

I hope you find some inspiration in this quick card if you are wanting to make one for someone on your thank you list. :)

And we at SRM all want to say "thank you" to our friends and fans for another wonderful year.  Come back and see us next year! :)

Monday, December 29, 2014

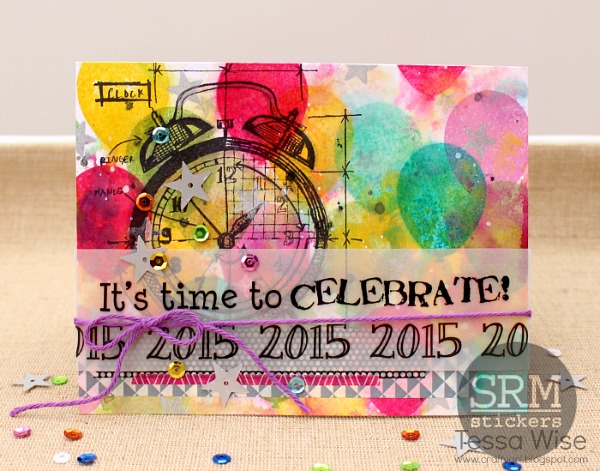
Celebrate 2015 Mixed Media Card by Tessa


Hello!  It's Tessa sharing with you today!  I've created a card perfect for ringing in the new year!

Celebrate 2015 Mixed Media Card by Tessa - #2015 #card #newyears #twine #stickers

I created a bright and messy mixed media background for this one-mixing stamps from Simon Says Stamps and Tim Holtz for a fun look.  I stamped the balloons first, in bold pinks, yellows, and turquoise inks.  Next, I pulled out some paints and dabbed them on to a craft mat.  I sprayed it with water and dragged my card front through it.  It softened the balloons and gave the card a fun, messy look.  I added some splatters with a few different mists and let it all dry. 

Celebrate 2015 Mixed Media Card by Tessa - #2015 #card #newyears #twine #stickers

When it was dry, I stamped some stars with a silver metallic ink and the clock with a waterproof black ink.  I also added some shading around the clock with a light gray marker.  I pulled out some washi tape next and added a few strips to the bottom portion of the card front.

I cut a strip of vellum and wrapped it around my card, adhering the ends together inside with a bit of washi tape.  I adhered the 2015 strip from the Year of Memories 2015 sheet first, lining up the bottom edge of the sticker with the edge of the vellum.  The sentiment from Sticker Sentiments Congratulations came next.  I lined it up just above the 2015 strip.

To finish this card off, I wrapped some Solid Lilac Baker's Twine around the card and finished in a bow.  I added a sprinkling of sequins, too!  You gotta have a little sparkle on New Years, right? :)

Thanks for joining me today!  And here's to a wonderful new year!

Friday, December 26, 2014

Happy 2015 Card by Lorena


Hi SRM friends! Lorena here today. By now you've probably sent all your Christmas cards, but wait! There's still some time left to wish your beloved ones a Happy New Year and SRM has some awesome stickers to do that in style.
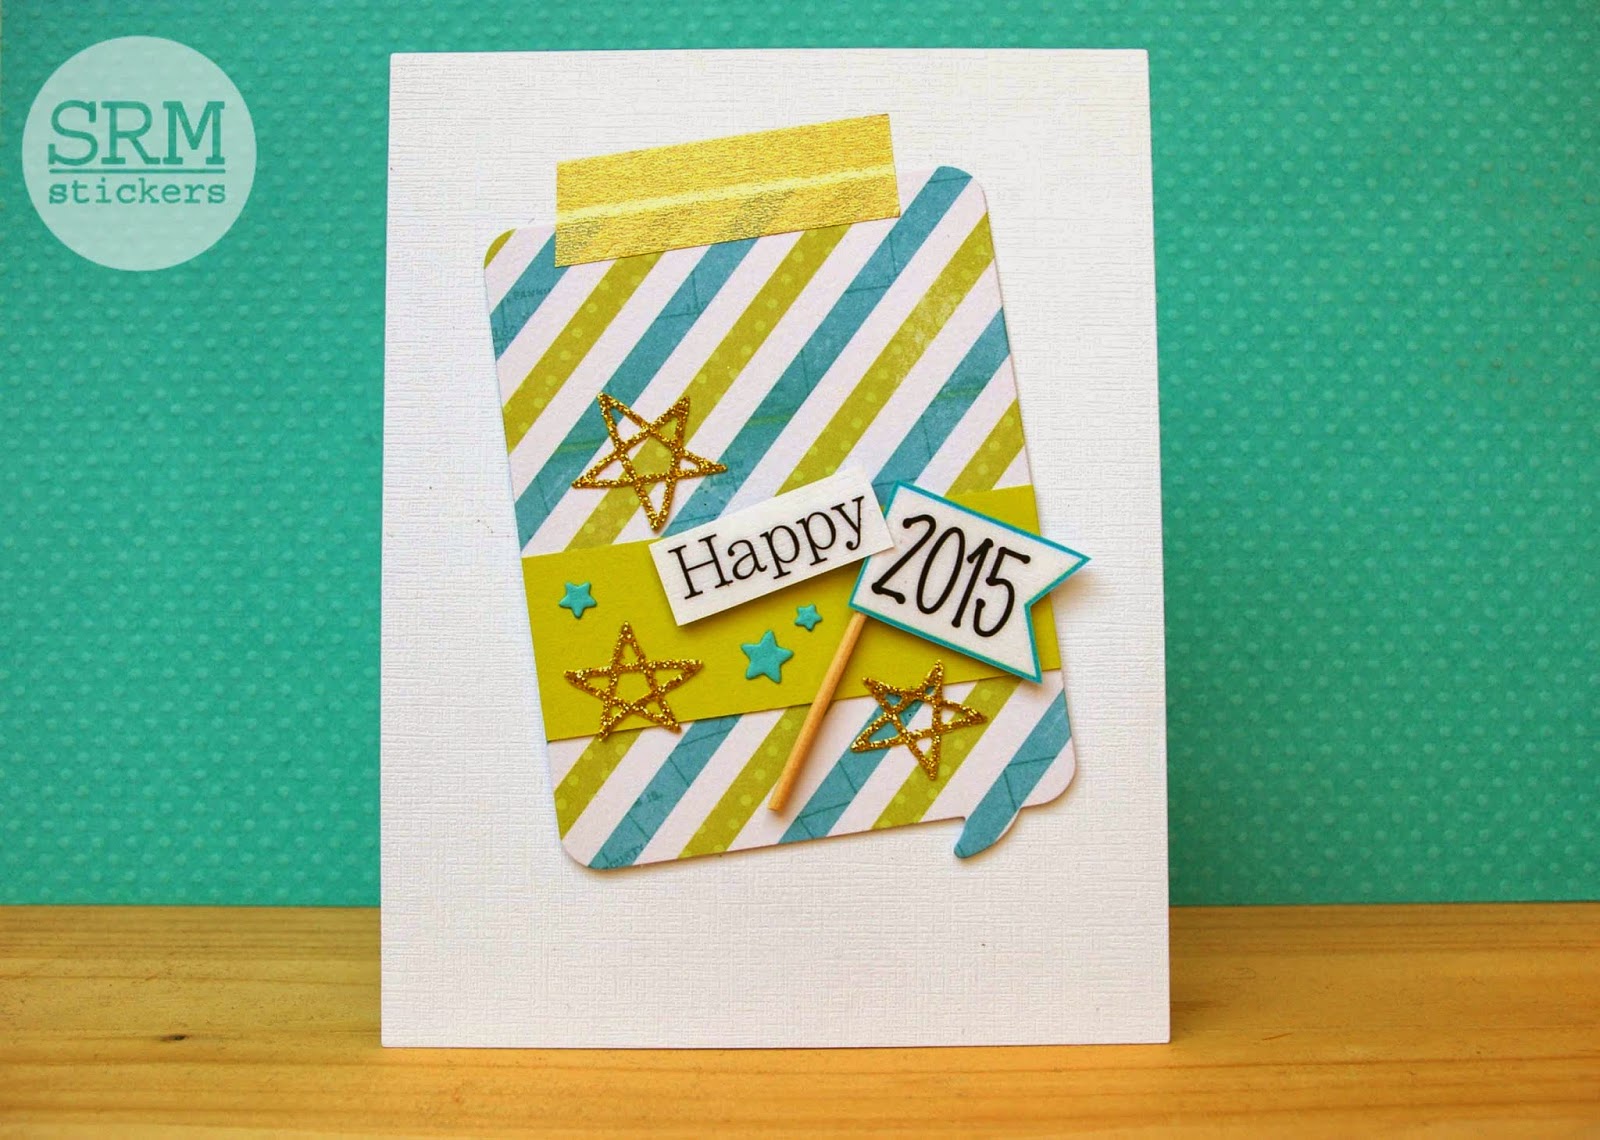
Here's a Happy 2015 card to get you started. I went for a bright color combo of gold, lime green and turquoise, because there's nothing better than starting a new year with happy colors. 

SRM Stickers Blogspot - Happy 2015 Card by Lorena - #card #2015 #newyears #stickers

I combined a patterned paper background with one of the cute year banners in the Year of Memories 2015 sticker.


 I turned the sticker into a flag by adhering it to a piece of toothpick. This sticker sheet is simply fantastic. You'll find "2015" in lots and lots of different fonts and designs, which makes it perfect not only for cards, but for calendars and scrapbooking too. Great value, I tell you!

SRM Stickers Blogspot - Happy 2015 Card by Lorena - #card #2015 #newyears #stickers

The "happy" comes from Stickers by the Dozen/Birthday Birdie. Every SRM sheet comes so jam packed with stickers that I don't feeel bad when I cut just part of one to make my custom sentiment. To add a festive "new year" touch I threw in some glittery gold embellishments and three tiny die cut stars.

SRM Stickers Blogspot - Happy 2015 Card by Lorena - #card #2015 #newyears #stickers

I wish all the SRM fans a very happy 2015 filled with lots of love, joy, laughter, good health and all things crafty. Thanks for visiting!

Wednesday, December 24, 2014

Christmas Kraft Bag by Shantaie


'Twas the night before Christmas... Shantaie Fowler joining you doing some last minute wrapping!  I'm so happy you decided to stop by because I have such a fun set of tags to share with you! I will start by telling you how each year I plan a fun and {usually crazy} theme for our Christmas season, last year was Grinchmas in whooville, that was a lot of fun and may be hard to top! This year we decided to try "Alice in winter wonderland" as our theme. Not so much the "down the rabbit hole" Alice as it is a woodsy wintery wonderland. I wanted to make a set of package tags to give as a gift to my daughter within our theme. I knew an embossed kraft bag would be the most perfect way to present them to her!


I started with a chevron embossed kraft bag and added a luxurious silver doily  directly to the bag and layered it with the patterned paper I used for my top hats that I cut with the Silhouette. I embellished the bag with a bow and lace, a feather and shimmer twine in gold.


Each tag is embellished with a ribbon and a feather. I glittered little flags that are dressed with Fancy sentiments as is the front of the kraft bag.  I had so much fun making these tags and I know she will love them! I can bet she will love that bag even more than the tags that come in it! :)


You can take this idea and use it for other holidays an occasions.  I simply love all the packaging options from SRM.  They truly have helped to make my Christmas merry and bright! :)

Tuesday, December 23, 2014

December Documented Album by Christine


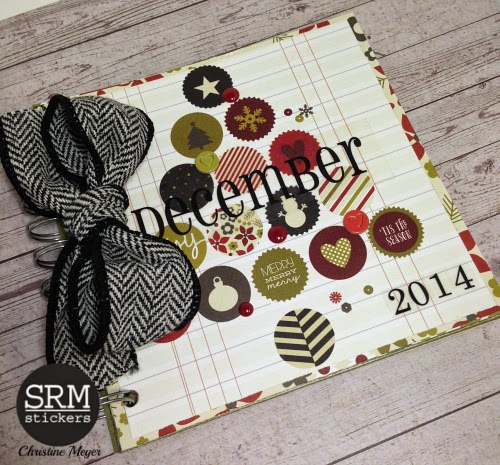
Hi SRM Fans!  Christine joining you today.  I have never done a December Documented Album and have always wanted to!  My December is always busy so I decided to create the base in advance and then I can just add pictures and embellishments as I go.  As I was thinking through my process, SRM Stickers kept coming to mind so I decided to dive right into that! Today I am going to share with you the starting process and some ideas for how to use SRM Stickers on your base pages - especially focusing on the numbers.  And remember, you can create this album anytime and drop your December photos in!  After the holidays would be perfect!

SRM Stickers Blog - December Documented Album by Christine - #decemberdaily #christmas #minialbum #stickers #doilies #punchedpieces

Part of the reason I knew that SRM was perfect for this job was because I knew I had ready made numbers and months that would look good with nearly any patterned paper.  I loved this tree patterned paper and just added the December from the Calender Months Large/Snappy Set. I knew I definitely wanted the year on the cover as well and the We've Got Your Numbers - Small were perfect for adding it to the corner.  We could be here all day if I show you all 25 pages of the album so I am just going to share a few of them that I really love!

SRM Stickers Blog - December Documented Album by Christine - #decemberdaily #christmas #minialbum #stickers #doilies #punchedpieces

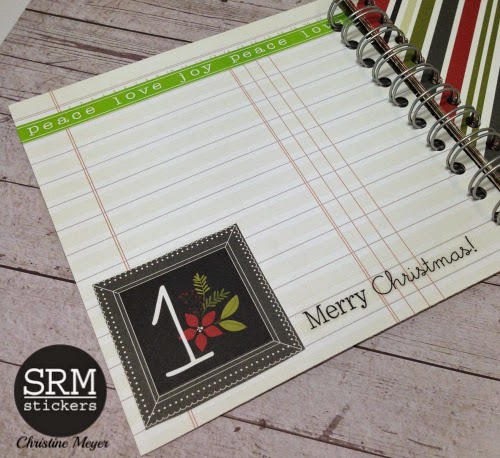
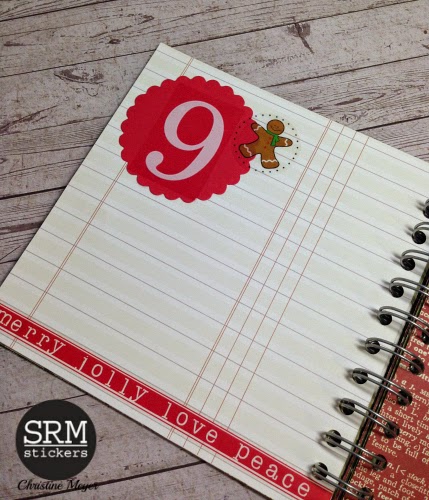
To keep things easy I stuck entirely with one patterned paper line.  The line had numbers with it too so for some added interest I used those on a few pages.  To accent this page I used a Merry Christmas sticker from the Christmas Stickers by the Dozen and a Peace Love Joy border sticker from the Take 2 Stickers by the Dozen: Christmas.  As you can see there is plenty of room to add a picture and some journaling for the day.

SRM Stickers Blog - December Documented Album by Christine - #decemberdaily #christmas #minialbum #stickers #doilies #punchedpieces

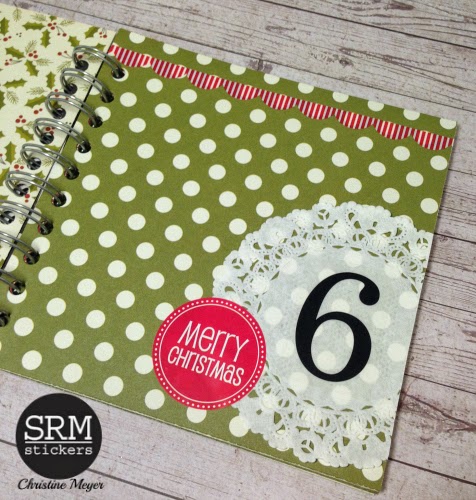
Oh how I love SRM's 4 inch doilies!  So they made lots of appearances in the album :)  I also used a Merry Christmas round sticker from the Take 2 Stickers by the Dozen: Christmas to add a pop of red.  The border is from We've Got Your Border Christmas.  I was surprised how much I liked that against the polka dots!  The 6 comes from the We've Got Your Number - XL Black set.  These numbers in black and white area simply awesome... perfect for adorning everything from layouts to pocket pages to mini albums!

SRM Stickers Blog - December Documented Album by Christine - #decemberdaily #christmas #minialbum #stickers #doilies #punchedpieces

The new punched pieces are also a fabulous addition to mount your numbers onto!  More from the We've Got Your Border Christmas helped to trim this page along with a cute little gingerbread from the Stickers by the Dozen Gingerbread Man set.

SRM Stickers Blog - December Documented Album by Christine - #decemberdaily #christmas #minialbum #stickers #doilies #punchedpieces

This last page that I am going to share gives you one more idea for mounting your numbers and that is to use SRM Labels. Since my patterned papers had black in them I opted to use some of the Black White Labels by the Dozen.

Now that you've seen some of the base how about a look at some of the finished pages!  Yes, this mom of four has managed to get some pages done already!  YAY!

SRM Stickers Blog - December Documented Album by Christine - #decemberdaily #christmas #minialbum #stickers #doilies #punchedpieces

If you make an album using some SRM Stickers make sure to share it with us!  I'd love to see some of your ideas too!

Monday, December 22, 2014

December Pocket Page Layout by Tessa


Hello!  It's Tessa joining you today with a fun pocket page layout!  Since we are celebrating everything Bossy Joscie Flair since the beginning of the month, I thought to make a pair of pocket pages with a touch of Flair, Bossy Joscie Flair! 

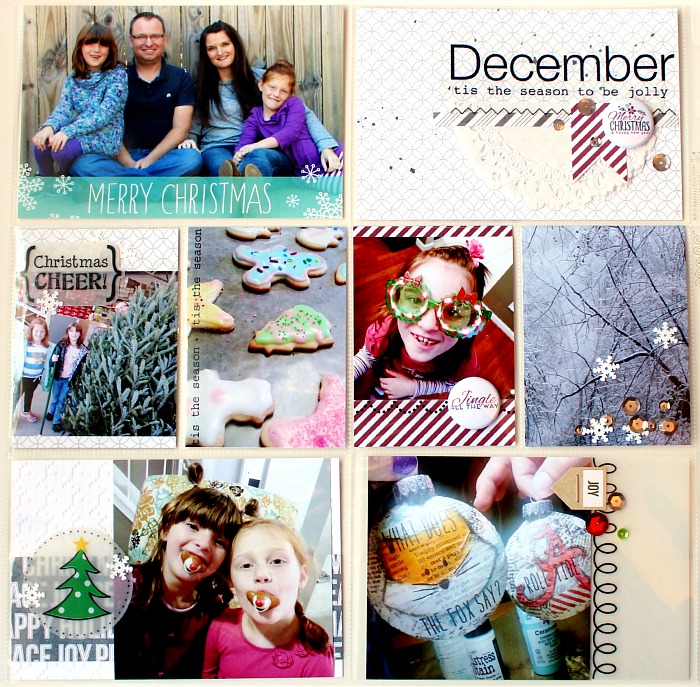
We are so busy around the holidays!  I always think it would be fun to create an album just for December but when it comes down to it, I just don't have time!  Pocket pages seem to be my answer -- lots of room to display many photos.  Can you spot the Bossy Joscie Flair on this page?

SRM Stickers Blog - Pocket Pages with Flair by Tessa - #pocketpages #bossyjoscie #flair #stickers #doilies #twine

I wanted my pages to be picture heavy but still have some cute embellishments.  I chose stickers from the following sheets:

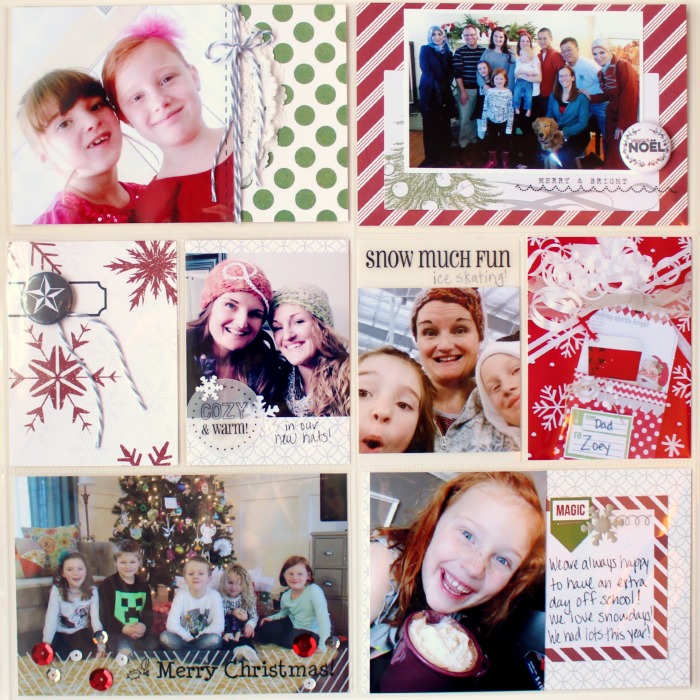
I mixed the stickers with papers from Teresa Collins' Candy Cane Lane line and added a little flair from the Bossy Joscie Modern Christmas collection.  I also used some 4" White Lace Doilies and Stone baker's twine.

 love the look of vellum right now and ended up using quite a bit of it on this layout.  They add a semi-opaque layer that looks really cool over the photos.  Do you spy the pair of Flair on this page?

SRM Stickers Blog - Pocket Pages with Flair by Tessa - #pocketpages #bossyjoscie #flair #stickers #doilies #twine

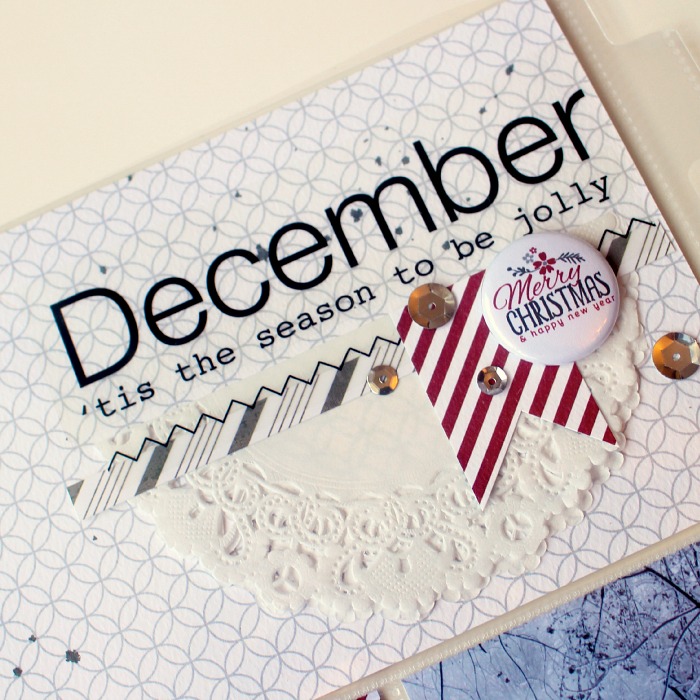
I created a title panel on my first layout.  The December sticker from the Sticker Months Large/ Sleek sheet worked perfectly for this!  I stuck it down onto the background paper and then added the sentiment from the We've Got Your Stickers Plus/ Christmas Tree right below it.  Below the title, I made a cluster of embellishments including a Bossy Joscie Christmas flair using a doily folded in half as my base.  I love the look of all these goodies together!

SRM Stickers Blog - Pocket Pages with Flair by Tessa - #pocketpages #bossyjoscie #flair #stickers #doilies #twine

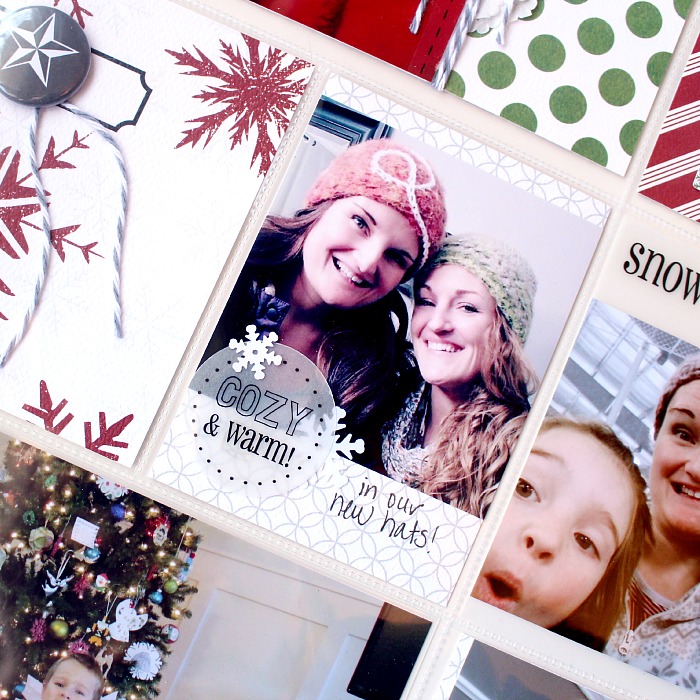
Here is a peek at more stickers in action- the Christmas cheer sentiment from the Sticker Sentiments/ Happy Holidays sheet.  It was layered onto vellum and cut out.  On the panel next door, I added a sentiment straight onto the picture- such a fun look!

SRM Stickers Blog - Pocket Pages with Flair by Tessa - #pocketpages #bossyjoscie #flair #stickers #doilies #twine

Here is more vellum layering and a touch of Flair:

SRM Stickers Blog - Pocket Pages with Flair by Tessa - #pocketpages #bossyjoscie #flair #stickers #doilies #twine

I added a transparency sheet over this photo and then added sequins and another sentiment from the Sticker Sentiments/ Happy Holidays sheet.  


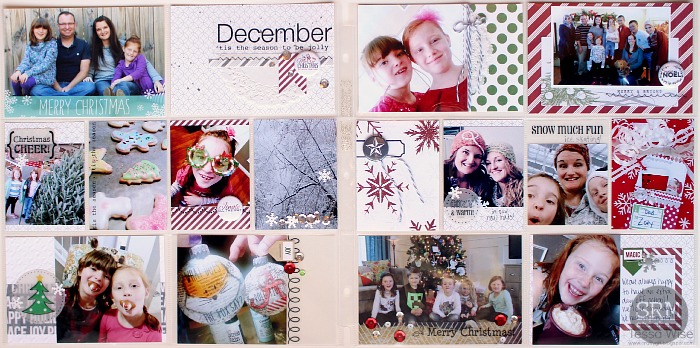
Here's the double page layout.  Be sure to click on the image to enlarge.  

SRM Stickers Blog - Pocket Pages with Flair by Tessa - #pocketpages #bossyjoscie #flair #stickers #doilies #twine

I am already planning to use a pocket page design for this year's December activities!  I love how easy it was to put it all together- especially with cute SRM products!  This was so much fun!

This post concludes on Bossy Joscie feature.  Two weeks of Bossy Joscie and SRM has been a blast!  Be sure to share your Bossy Joscie & SRM projects on our Flickr.  Thank you Joscelyne Cutchens for such fun and fabulous products. We loved having you visit with SRM.  

Want to WIN a stash of SRM Stickers and some Bossy Joscie Flair?  Just leave a comment here on the blog today for a chance to be a winner.

Sunday, December 21, 2014

Christmas Gift Bags by Lorena


Hello friends! It's Lorena here with a couple more ideas to dress up the adorable SRM Muslin Bags. There are so many things you can do with them! Even with all the frenzy of this Season, it's really quick and easy to decorate a few of these in very little time.

This is a special weekend post because we have so many fabulous Christmas projects that we want to squeeze in for last minute gift bag ideas.  So sit back and enjoy. 

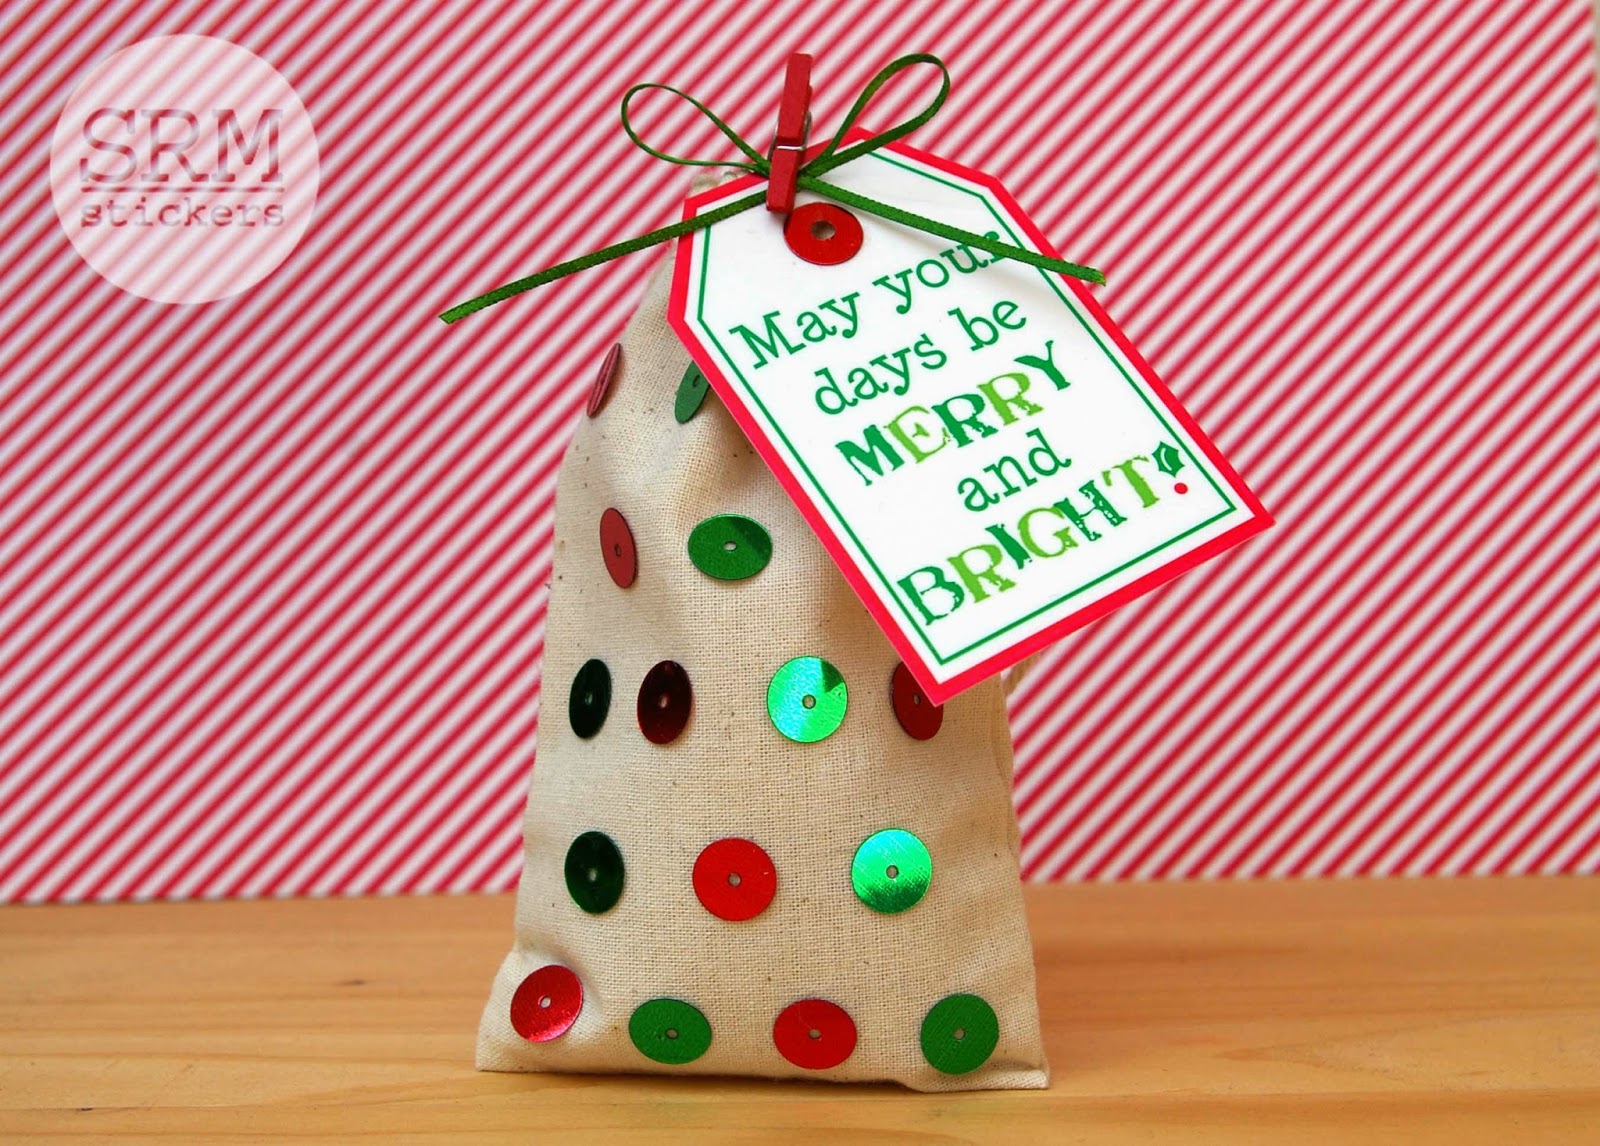
The first idea involves sequins. I'm sure you have a huge stash of this shiny little guys, right? I always wonder if I'll ever be able to use them all. Well, here's an option to make a dent in your sequin stash.

SRM Stickers Blog - Christmas Gift Bags by Lorena - #muslinbags #christmas #giftbag #stickers #stencilvinyl #diy

I adhered festive flat sequins in rows. I didn't want to mess up with liquid glue, so I used a tiny piece of double sided adhesive tape on the back of each sequin to attach them to the bag and it worked fine. I tested how well they held by fiddling around with the bag and putting a little gift inside and out a few times and no sequins fell off, so it's safe to say that double sided adhesive (like scor-tape) works great.

SRM Stickers Blog - Christmas Gift Bags by Lorena - #muslinbags #christmas #giftbag #stickers #stencilvinyl #diy

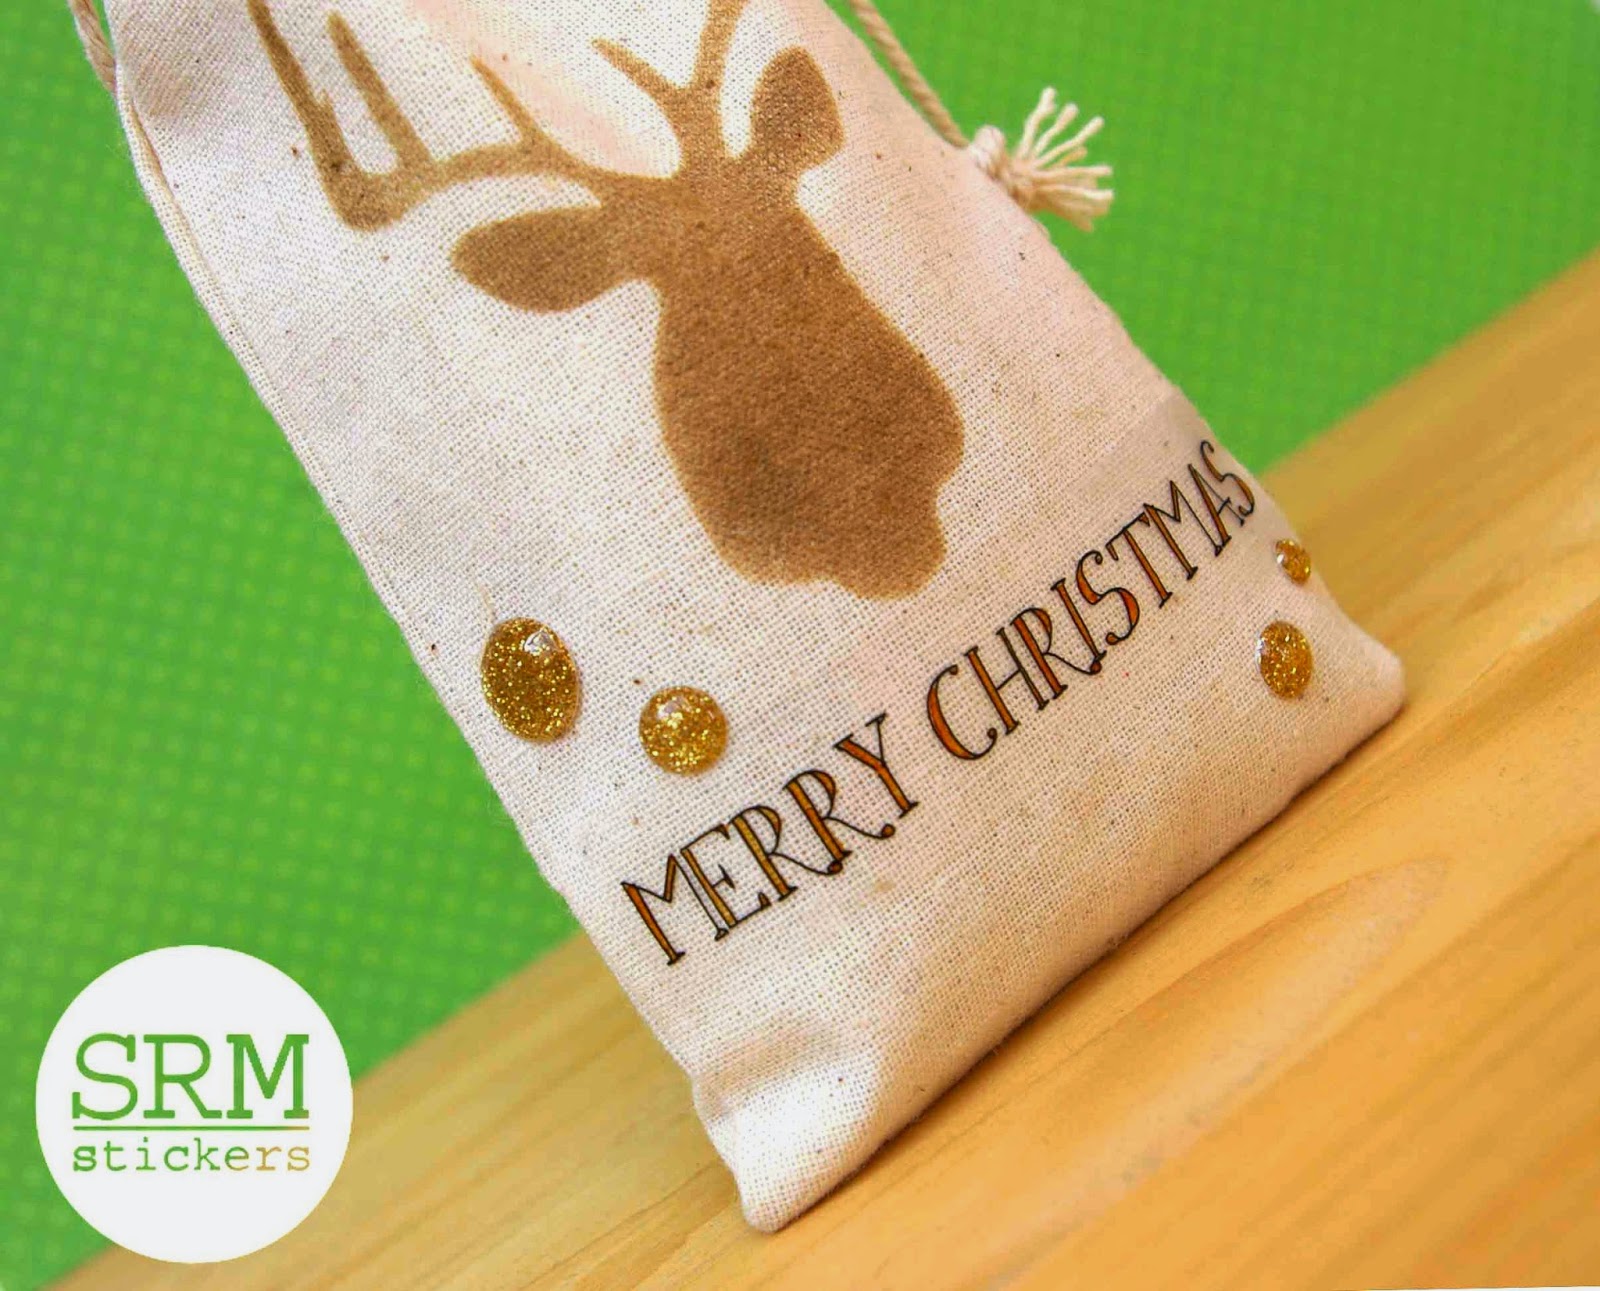
In the second bag, a very trendy Christmas icon takes center stage. Stags are everywhere this Christmas, so I stenciled one on the gift bag. I used a cut file and my Silhouette Cameo, and cut the stag from SRM stencil vinyl, so I can reuse it again and again. Instead of paint, I went with pigment ink. It doesn't bleed and works perfectly.

SRM Stickers Blog - Christmas Gift Bags by Lorena - #muslinbags #christmas #giftbag #stickers #stencilvinyl #diy

Here are a couple of tips for stenciling on the muslin bags: Cut a pice of cardstock or chipboard that is a bit smaller than the bag size and place it inside the bag. This way the paint or ink you use for stenciling won't bleed to the back side of the bag, and you will also have a more stable surface to do the stenciling on.

SRM Stickers Blog - Christmas Gift Bags by Lorena - #muslinbags #christmas #giftbag #stickers #stencilvinyl #diy

Once the stag was stenciled, I added a sentiment sticker from Sentiment/Happy Holidays and I altered it a bit by filling the inside lines of the letters with a brown copic marker. Any alcohol based marker like Copics or Sharpies will work on the SRM stickers, and you can alter them anyway you want! Some glittery gold enamel dots finish off this second bag.

That's it from me today, thank you so much for stopping by!

Saturday, December 20, 2014

Kraft Box Free For All by Shantaie


Hello and thanks for stopping in! This is another special Saturday blog post since we have so many fabulous projects for Christmas!  Shantaie Fowler here with a SRM Kraft box all dressed up for Christmas. The endless use and decorating possibilities for the kraft box are mathematically mind boggling, I honestly could never run out of ideas for these amazing little beauties! As our biggest gift giving and wrapping season is upon us I am turning to the kraft box and all of SRM's packaging to lend me a hand!  

SRM Stickers Blog - Kraft Box Free For All by Shantaie - #christmas #krfatbox, #doilies #packaging #stickers #labels #giftbox

I started with a handful of pretty 12X12 papers and lined the interior of the box, so it will be a surprise pop of gorgeous when its opened! I mixed up my patterns and added a border sticker from the Christmas Stickers by the dozen

SRM Stickers Blog - Kraft Box Free For All by Shantaie - #christmas #krfatbox, #doilies #packaging #stickers #labels #giftbox

To dress the box I layered patterned papers and a couple of journaling cards, a 4" doily anchors the ribbon and floral pick embellished with a "to and from" Label from the pastel labels by the dozen

SRM Stickers Blog - Kraft Box Free For All by Shantaie - #christmas #krfatbox, #doilies #packaging #stickers #labels #giftbox

Add a pair of jingle bells to your bow and a sprinkle of sequins for added sparkle and this kraft box is ready to gift in style! 

SRM Stickers Blog - Kraft Box Free For All by Shantaie - #christmas #krfatbox, #doilies #packaging #stickers #labels #giftbox

Stock up on packaging for easy and beautiful wrapping this Holiday season........... and hey why not  for all occasions!   Thanks for stopping by!

Friday, December 19, 2014

Bossy Joscie Gift Tags by Cassonda


Hello all! Cassonda here to share with you some fun gift tags I created for my packages this Christmas. Thanks for joining in the fun with SRM and Bossy Joscie! 2 GREAT products that work together beautifully. 

One of my favorite things to create is tags. Tags, tags and more tags. I love 'em all! They are small and super fun! 

SRM Stickers Blog - Bossy Joscie Gift Tags by Cassonda - #flair #bossyjoscie #numbers #stickers #doilies #tags #twine

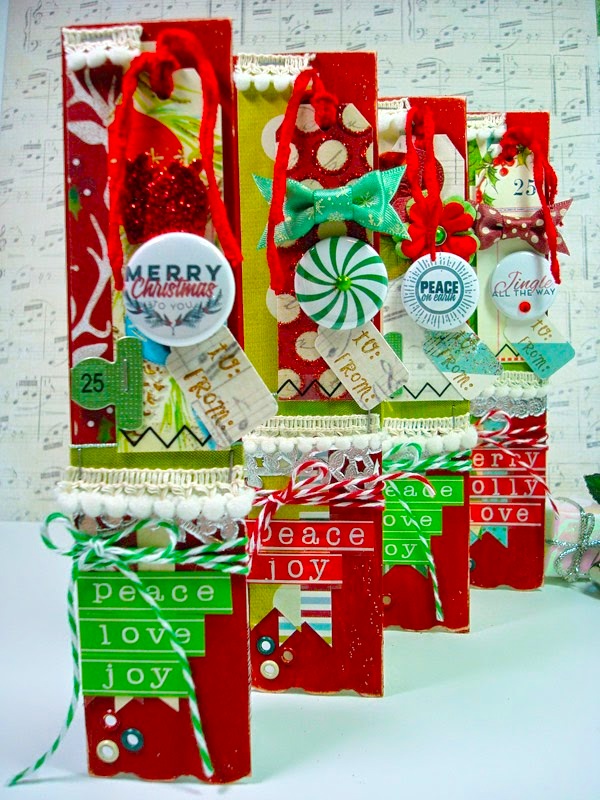
For these holiday tags I used the back packaging of some BoBunny embellies and added some paint. After the paint dried, I went to town embellishing the front to my hearts content.  Stickers…twine…borders…numbers…doilies...flair and lots of other embellishments too!

SRM Stickers Blog - Bossy Joscie Gift Tags by Cassonda - #flair #bossyjoscie #numbers #stickers #doilies #tags #twine

 I can't wait to attach these to some packages for Christmas!

SRM Stickers Blog - Bossy Joscie Gift Tags by Cassonda - #flair #bossyjoscie #numbers #stickers #doilies #tags #twine

SRM Stickers Blog - Bossy Joscie Gift Tags by Cassonda - #flair #bossyjoscie #numbers #stickers #doilies #tags #twine


Hope I've given you some last minute holiday inspiration!  Merry Christmas to all…
and happy crafting!