Tuesday, November 30, 2010

{hugs}

Hello and welcome to another tube feature! We'll be showing you how to dress up and fill our new tubes every week at the Blog. I created a set of bling tubes for my sisters. We are exchanging 'bling' for Chrimstmas, along with other crafty items, and this is what I came up with for a unique, sparkly gift.

To fill my tubes, I purchased white Petaloo flowers with gemstone centers, two packages of Making Memories white and silver jewels, and a package a mini white satin roses;


And here they are, all filled up! I used SRM's {hugs} Quick Card set for my tags and placed the 'hugs' sticker right on the tubes;


Order your tubes, HERE! See you tomorrow for our Cosmo Cricket Blog Hop!


jenyfur

Monday, November 29, 2010

Christmas Card Set by Nina

Nina is quite busy creating Chrimtmas cards. She intends to make 150 cards in sets. Here's a glimpse of one of her sets using SRM Stickers "Happy Holidays" (51001). Are you making your own holiday cards this year? Are you using SRM Stickers?


We have a very full week for you here at the Blog which includes a Cosmo Cricket Blog Hop and a Design Team Call!


jenyfur

Thursday, November 25, 2010

Happy Thanksgiving


Happy Thanksgiving to our USA readers! We hope your holiday is filled with family and joy. Just a few projects for you today...

Susan altered a treat container using Marvy's Border Punch System and SRM Stickers to give as a special gift;


And here's a wonderful idea for paper napkin rings by Deana. Deana also used Marvy's Border Punch System;


Have a wonderful holiday, we'll see you again on Monday! Stay tuned, we'll be posting a Design Team Call next week!

Wednesday, November 24, 2010

Tubes - Day THREE


Welcome to the final day of our tube feature. Have you picked up your tubes in our online store? Of course if you make any, email me with photos or add them to our Gallery -- I'd love to showcase them here on the SRM Stickers Blog. We've decided to feature tubes regularly so the inspiration will keep coming! We have more fabulous tubes for you today...


by Tania:

The back of the tag holds the recipe for the hot cocoa and what to do with the Andes mints. I like to melt mine into a cup of hot cocoa. Each tube will hold two packets of store-bought hot cocoa mix, which is what these are fill with, BUT, here's my personal favorite homemade recipe that makes a ton in case someone is making these in bulk.

Recipe to make your own:

1 large box of instant dry milk
11oz powdered non-flavored coffee creamer
1 (16oz) container of Chocolate Nestle Quik
1 c. powdered sugar
Mix and store in airtight container.

Fill mug 1/2 full with mix, add hot water. Stir and enjoy. For an added treat, add 1 or 2 Andes mints to your hot cocoa. Bliss.


by Gina:
Gina created three very different tubes containing lemon drops, candies, and marshmallows;


by Amy:
Amy used mulling spices and cinnamon sticks for her "Thanksgiving" or "Fall" themed tubes. These would make a fun gift if you wrapped them in a mug as a gift.


I'll be back tomorrow with a quick post and a Thanksgiving project, then back again next week with a full week of stickers!

jenyfur

Tuesday, November 23, 2010

Tubes - Day TWO


I hope you enjoyed the tubes we posted yesterday -- here's more!

by Tanis:
Tanis says... For best friends, I allow the kids to spend a bit more on their gifts. And what kid doesn't like cash? I stacked 16 dollars worth of quarters (perfect for trips to the convenience store) and topped it up with some rolled bills. You could also just stack it with bills. If you fold them in half long ways, 5 rolls will fit in the tube and you can fill it with any amount of cash.


by Deana:
Deana created Valentine tubes using our Valentine Stickers.


We have more tubes for you tomorrow, be sure to stop by to see the other clever and creative ways our Designers are using tubes!


jenyfur


Monday, November 22, 2010

Tubes - Day ONE


Welcome to Day One of a three-day feature! We're showing off our newest product -- tubes! Our tubes are so much fun to fill and decorate. The SRM Stickers Designers have come up with several uses and samples...you will love what they've done!

You can purchase tubes in our online store. Click HERE to fill your cart so you can get crafty with tubes. They're food safe, kid safe, cute, funky, and fun!


by Tobi:
Tobi created a set of 6 holiday tubes using die cuts and Hershey kisses for a fundraiser giveaway...


by Carole:
Carole filled her tubes with homemade reindeer food, a cute christmas craft for little ones: a mixture of oats, glitter & sugar, to be sprinkled on your lawn on Christmas Eve to draw Santa's reindeer to your house. Each miniature scroll has this poem printed on it:

sprinkle on your lawn at night
the moon will make it sparkle bright
as santa's reindeer fly and roam,
this will guide them to your home


by Jen M.:
Jen created a few holiday themed tubes as well as an all occasion tube filled with paper flowers...


by Kathy:
Kathy created a set of gift tubes containing 6 ready-to-go SRM sticker sentiments in each. She even provided coordinating buttons in each tube...


We have a lot more for ya - be sure to join us tomorrow and Wednesday for more! If you get crafty with our tubes, load your project into our Gallery. We'll be featuring tubes regularly on the Blog!

Friday, November 19, 2010

Flickr Friday

Welcome to another Gallery spotlight feature at the SRM Stickers Blog! We have a lovely collection of gems found in our Gallery. Amazing work with SRM Stickers, ladies! Just click on their name to be taken to their gallery photo.


by Ivanka:


by Pam in Memphis:


by Tanya Tahir:


by SRM Designer, Carole:


See you next week as we showcase TUBES for three entire days! You will be absolutely inspired by what the Designers have created. Have a great weekend!


jenyfur


Thursday, November 18, 2010

John gets crafty!


Our fearless leader, Susan and her dear husband John, are getting into the holiday spirit in Southern California. John got his hands on the marvelous Marvy border punch system that we featured last week (click HERE) and got his craft on!


Those of us who have been lucky enough to meet John, absolutely adore John. He's so kind, and helps us with whatever we may need. Who knew he had a secret scrappy side?! John put together these treat bags in a jiffy;


Susan wrote her traditional Santa Letter and included a cookie for the big guy. Gotta love the expression on the cookies' face! Totally makes me giggle.


I hope you enjoyed our fun and festive feature today. Come on back tomorrow as we wrap up the week with a Flickr Spotlight. If you've gotten crafty with SRM, make sure you load it into our Gallery asap!


jenyfur

Wednesday, November 17, 2010

Merry & Bright Gift Card Holder


We'll be showcasing all kinds of gift holders from the Design Team in early December. You won't want to miss the clever ways our Designers have come up with to hold small gifts.

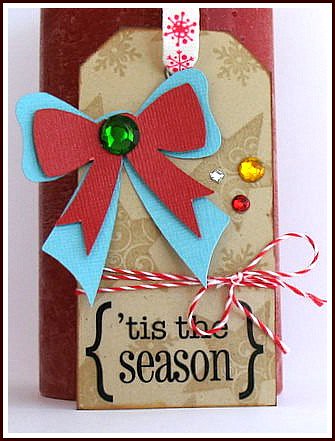
Tanis is here with a sneak peek gift card holder. Tanis snipped off the top of a coin envelope to create a card pocket. Notice how her SRM Sticker sentiment from "Happy Holidays" is adhered on her focal image and flows seemlessly onto the mat behind it? I love that about SRM Stickers. Tanis also used the "'tis the season" sticker strip from our "Happy Holidays" sentiment sheet.


I'll be featuring a few treat bags tomorrow. They are very special and you'll see why!


jenyfur


Tuesday, November 16, 2010

Holiday Gift Tags & Winners!


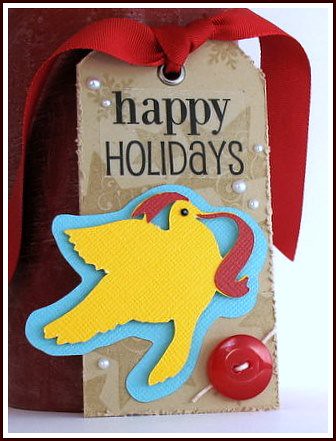
Hello and welcome back! You may create your own holiday cards, but do you make your own gift tags? They are so much fun to make -- like little Artist Trading Cards. I put together these tags along with my Making Memories Slice machine and SRM Stickers;


And finally, here are our Marvy winners! Congratulations, ladies, please email us with your postal addresses to claim your prize, be sure to let us know what you've won!


Marvy Border Punch System:

Colleen said...
What a fabulous idea for a border punch! Love it! And amazing projects by your team to showcase their use!!
November 11, 2010 9:15 AM

Amy said...
These are all wonderful!! I ♥ border punches.....thanks for the chance to win!!
November 11, 2010 10:07 AM

Sandra P said...
Oh my....these projects are all amazing! I especially love carole's clean and simple card :) They are all darling. Thanks for the chance at a wonderful prize! Hugs, Sandra P
November 11, 2010 11:01 AM


Marvy Trimmer with Decorative Blades:

Calypso said...
This looks like something I have to put on my Christmas list!!! I love all the baeutiful projects the DT did....they make it the product even more irrestible. Calypso
November 12, 2010 2:06 PM

ellen s. said...
i love love the soft edge...it is so subtle. i just love that. these look awesome and I am a huge huge marvy fan! i have tons of their punches so i know i would like this
November 12, 2010 6:19 PM

Rebecca said...
absolutely amazing cards! I love what everyone did with the trimmer and deco blades! --rebecca keppel
November 14, 2010 2:21 PM


jenyfur

Monday, November 15, 2010

"Hi" from Amy

Hello! Welcome to the SRM Stickers Blog. I hope you were able to do something crafty this weekend. If you used SRM Stickers, be sure to upload it to our Flick Gallery. We showcase gallery finds everyday on our Facebook Fanpage.

Amy's here today with a bright and cheery card using our "Hello" We've Got Your Sticker" set;


Love the grid pattern and ribbon treatment!

Be sure to head back here tomorrow for the winners of our Marvy feature last week! I'll also have gobs of Christmas tags for you if you're looking for inspiration to get started on your handmade gift tags.


jenyfur

Friday, November 12, 2010

Marvy Feature; Trimmer & Decorative Blades


We're back with more Marvy reviews and projects. This time we put Marvy's new Paper Trimming Buddy to work, along with its eight decorative blades.


Can't you just envision the many uses for these blade cartridges?!


Here's what the SRM Stickers Team was able to do with the versatile decorative blades...sit back, enjoy, and don't forget to keep reading! (psst...prizes!) The Team chatted a bit about Marvy's Border Punch System that we featured yesterday along with today's feature product.


by Gina:


Gina says; Marvy's NEW border punch system is the easiest tool to use, and it makes PERFECT borders EVERY SINGLE TIME! No more needing to eyeball and hope you've lined up the punch in the right spot, the slots allow you to make that perfect border every time. Love that there are so many different cartridges to use in the paper trimming buddy - easy and convenient!


by Nina:


Nina says; What I like about the punch system is the no guessing where to punch next to make sure the borders are lined up correctly. I also like the fact that it doesn't take up as much room as normal border punches. I love the Paper Trimming Buddy. It has replaced my big and bulky paper trimmer. My husband loves it too for work and is planning on getting one for his office next time we're in the US. The different blades are literally a snap to replace and use. I teach a card class and cut all the necessary pieces for the projects myself and put them in a kit. I used the scallop edge for my most recent class card kit and it was so quick to do, much faster than if I had to use a border punch. I cut a 12-in edge with one swipe of the rotary blade and that was enough to use on 3 cards!

by Tobi:


Tobi says; Okay, first let me say that the Marvy punch system was a great idea. I had NO problems lining up the punch to make flawless borders. I think this is a great product for people who get frustrated by using hand-held border punches and all of the lining-up problems that ensue. The trimmer: making a scalloped edge has never been easier! This is another great system with user-friendliness at its core. Just "lock and load" the different blades and poof you're ready to cut! Again, this is another easy-to-use, economical alternative to border punches!


by Amy:


Amy says; The new Marvy border punch system allows you to create perfectly aligned borders a cinch. Within just a couple minutes of trying out and getting into the groove of the simple mechanics of this new system I was up and running. I was able to create 3 separate 12" border punches in the matter of about a minute. Not only that, the positive images that are punched from your borders are large enough to use in your project as well, which I love - less waste! This is a super system and definitely ideal for those who like getting their border punches "perfect" the first time!


by Jen M.:


Jen says; I think I am in love with Marvy's Clever Lever Quick Borders Craft Punch! Border punches are all the rage right now and Marvy has made it fun and simple to create a gorgeous and consistent decorative edge.


by Kathy:


Kathy says; I started out using Marvy punches and I had to collect every one and every size. I love how Marvy's new punch and paper trimming systems have such wonderful blades and cartridge's that are compact, easy to use and excellent quality!! I am not one to read directions and I am happy to report I never had to read any for these new products. Everything is labeled so well you can't make a mistake. The CLEVER LEVER QUICK BORDERS CRAFT PUNCH I was thrilled with. I love the different cartridges that are beautiful, handy, small and compact. The best part is that you don't have to keep aligning your paper like you have to with regular punches that's a big time saver for me. They also cut through thick cards stock like butter.


by Deana:


Deana says; I've always been a fan of Marvy punches, but have REALLY loved using the Clever Lever Border Punch cartridges. You end up with perfectly punched borders every time. Love how it locks you into place as you're punching your borders! I will buy more cartidges for this, but right now my favorite is the ribbon stitch punch! Also SO happy with the Paper Trimming Buddy. I love that it includes a scoring blade, because up until now, I simply folded my cardstock. So perfect for card makers!


by Carole:


Carole says; this marvy cutting system is alot of fun. it combines the function of multiple cutting edges with the simplicity of a paper tirmmer ~ imagine having all sorts of decorative-edge scissors attached to the convenience of your paper trimmer, for smooth, straight cuts, no matter what size of paper you start out with. these trimming cassettes reminded me of some of my early crafting: when i was a kid, i would make my own christmas cards and tags by cutting out the images on the fronts of old christmas cards with my mom's pinking sheers. i would layer them onto new paper and add embellishments like string, raffia, ribbon, buttons, miniature jingle bells, whatever happened to be hanging around. i love handmade anything, and i think christmas is the best time for creating the most humble & homespun crafts.


by Tanis:


Tanis says; I totally LOVED using Marvy's new border punch system. The tool makes it so easy to line up your paper and punch a perfect border every time. And the cartridges change in a jiffy. One thing I really liked is the fact that you only have one punched sized tool - and the cartridges are nice and small. A super important factor for me and my storage limitations.


by Tania:
Please visit Tania's Blog for a complete tutorial on creating this wonderful cupcake box!


Tania says; For the average scrapbooker, the The Marvy Paper Trimming Buddy is truly and all-in-one system and a tool I'm thrilled to have. The system of changing out the interchangeable deco-edge blades (sold seperately) is so easy, I could do it with my eyes closed. With two young girls who love to craft with me, the built-in safety features noticeable when changing blades is what makes me love this trimmer even more. No longer do I have to worry about sliced fingers like I do with my guillotine trimmer. So long huge pile of deco edge scissors that frustrate my kindergartner to no end, hello Paper Trimming Buddy.....I think I love you.


How exciting is Marvy's Punch System that we featured yesterday?! To see it in action, visit Jing-Jing's Blog for a step by step in creating this double page layout;


Marvy would love to provide 3 winners with their Paper Trimming Buddy and Decorative Blades so you can see for yourself the wonder of Marvy products. Just leave a comment on this post and we'll choose three random winners. Remember, you must be a follower to win any of our contests/giveaways. Thanks for stopping by! Be sure to visit our Marvy feature post yesterday (scroll down) where we showcased a fabulous new border punch system. See you on Monday with a full week of stickers!